Orthographics PowerPoint PPT Presentations
All Time
Recommended
Orthographics in AutoCAD Author: whiteacre Last modified by: Stephen W. Hughes Created Date: 8/12/2003 5:23:20 PM Document presentation format: On-screen Show
| PowerPoint PPT presentation | free to download
Complete the ORTHOGRAPHIC DRAWING of the pyramid by drawing ... The Louvre, PARIS. TARGETS. SELF. TEACHER. Overall neatness. How accurate ? Faint construction ? ...
| PowerPoint PPT presentation | free to view
Marathi Morphology - definition of the task and ... Words are the orthographical strings separated by spaces and some ... is done category wise. ...
| PowerPoint PPT presentation | free to download
The set of surface words (strings) to be analyzed is a regular ... Malay requires special algorithms for reduplication. Phonological/Orthographical Alternation ...
| PowerPoint PPT presentation | free to download
ProjectWise Navigator V8 XM Edition Joe Croser Global Marketing Director, Platform & SELECT
| PowerPoint PPT presentation | free to view
Mechanical Design Design representation: enough information to manufacture the part precisely inspect the manufactured part [geometry, dimensions, tolerances]
| PowerPoint PPT presentation | free to view
Visualization involves being able to form a mental picture of what the object is to look like. ... help form a mental picture of the object. Summary Questions ...
| PowerPoint PPT presentation | free to view
Each square unit on the graph. paper should represent how many inches? ... 5. Using engineering graph paper, scales, and appropriate drawing utensils, sketch the ...
| PowerPoint PPT presentation | free to view
with distinct orthography and/or pronunciation and/or grammatical category count ... Orthography up to and including first vowel (as in Arciuli & Cupples, 2006) ...
| PowerPoint PPT presentation | free to view
Orthographic information: with or without final grapheme ... Including the final grapheme in the model improves mean accuracy by about 1 ...
| PowerPoint PPT presentation | free to view
GIID offers a 1-year interior design diploma course in Kolkata, covering fundamental design principles, basic civil construction knowledge, and key interior design concepts. The curriculum includes instruction in tools like as AutoCAD, 3D Max, and Photoshop, as well as hands-on experience and mentoring from industry experts. Pupils get knowledge about color theory, orthographic projections, 3D rendering, and ergonomic furniture in order to get ready for graduate school or a job in interior design.
| PowerPoint PPT presentation | free to download
This is ppt show for Descriptive Geometry. This is a subject that deals with orthographic projection of points, lines, planes as well as solids. The subject helps in developing the concept of orthographic projection.
| PowerPoint PPT presentation | free to download
Title: 1 Author: Kwonyouan Last modified by: samsung Created Date: 4/16/2002 7:47:35 AM Document presentation format: Company
| PowerPoint PPT presentation | free to download
Blueprint Reading for the Machine Trades, Sixth Edition Unit 4: Reading Multiview Drawings
| PowerPoint PPT presentation | free to view
Orthographic, Isometric, Sectional Drawing
| PowerPoint PPT presentation | free to download
For more classes visit www.snaptutorial.com PSY 352 Week 5 Quiz Question 1 Perea, Acha, &Carreiras (2009) investigated the reading comprehension of text messages and found that: orthographically based text messages were comprehended just as effectively as normal text. phonetically based text messages were comprehended just as effectively as normal text.
| PowerPoint PPT presentation | free to download
An engineering drawing, a type of technical drawing, which is used to fully and clearly define requirements for engineered items with scales. Engineering drawing ...
| PowerPoint PPT presentation | free to download
racine-ir part-ir (je pars/nous partons/ en partant) racine-oir sav ... (je,tu) admets; il admet; ... ils admettent (4f.phon.) (j', tu) admettais...(3fp); j'ai ...
| PowerPoint PPT presentation | free to download
A PPT presentation on all category of sections practised in Engineering Drawing.
| PowerPoint PPT presentation | free to download
Drafting Product Design & Architecture Orthographic Projection Drafting Product Design & Architecture Orthographic Projection Sketching Multiview Drawings ...
| PowerPoint PPT presentation | free to download
Orthographic Projection Engineering Graphics Engineering Graphics Six Principal Views Engineering Graphics Basic Sketching Linetypes Visible Object - Thick Hidden ...
| PowerPoint PPT presentation | free to view
Sketching Multiview Drawings Multiview Drawing A multiview drawing is one that shows ... and Height 45 Width, Depth, and Height Orthographic projection is a ...
| PowerPoint PPT presentation | free to download
Model Documentation Working Drawing Documentation Once a design has been researched and approved, the part is sent to be prototyped or manufactured.
| PowerPoint PPT presentation | free to download
IV Projection A projection transformation moves from three dimensions to two dimensions Projections occur based on the viewpoint and the viewing direction
| PowerPoint PPT presentation | free to download
Title: Introduction Author: Tawit Last modified by: student Created Date: 10/27/2004 1:02:05 AM Document presentation format: On-screen Show (4:3) Company
| PowerPoint PPT presentation | free to download
... clipping Delay projection to preserve z-depth for z-Buffer computation * Orthographic Projection Convert clipping box ... the first shader language Houdini ...
| PowerPoint PPT presentation | free to view
Computer Graphics Three-Dimensional Graphics III
| PowerPoint PPT presentation | free to view
Orthographic Projection Sectional Views Section Views When a part has a lot of interior details, hidden lines can make the part hard to understand and dimension.
| PowerPoint PPT presentation | free to download
Structural Drawings Structural Drawings Structural Steel ... Double Line Drawing Single Line Drawing Isometric pipe drawing Orthographic pipe drawing *UC ...
| PowerPoint PPT presentation | free to view
Orthographic Projection Detail Views Detail Views A drawing of an individual part that contains all the information needed to manufacture the object is referred to as ...
| PowerPoint PPT presentation | free to download
Interactive Data Language (IDL) Margit Haberreiter (haberreiter@lasp.colorado.edu) LASP, room 135 Acknowledgement: Marty Snow
| PowerPoint PPT presentation | free to download
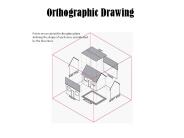
Orthographic Drawing Points are projected to the glass plane defining the shape of each view, as indicated by the blue lines Projection Plane The layout as shown here ...
| PowerPoint PPT presentation | free to download
Coatbridge High School Orthographic to Isometric Drawing the Plan and Elevations Drawing a crate Cutting out parts of the crate Cutting out parts of the crate ...
| PowerPoint PPT presentation | free to view
Title: Model Documentation Author: Edison Engineering Department Last modified by: waddd Created Date: 7/17/2000 2:48:51 PM Document presentation format
| PowerPoint PPT presentation | free to download
Very important and quite undervalued. Necessary for all materials intended for printing or publishing. Proofreading does not cost much and can greatly improve the impression. Stylish and dapper orthographic text is a pleasure to read. If you are speaking to the public, do not underestimate it. Do you have a text that is preparing to announce, let us proofread it. We will correct all your mistakes and make it meaningful. Proofreading can provide a visible change.
| PowerPoint PPT presentation | free to download
Technical Drawing Visual Communication of Technical Information Technical Drawing Visual Communication of Technical Information Overview Review Orthographic ...
| PowerPoint PPT presentation | free to view
Graphic Communication Oblique Views Department of Technological Education Oblique Projection The given views show the orthographic views of a mantle clock.
| PowerPoint PPT presentation | free to download
Orthographic Projection ( ) ( ...
| PowerPoint PPT presentation | free to view
Working Drawings (Production Drawings) ... Working drawings rely on orthographic projection and many other ... An assembly or subassembly drawing showing all the ...
| PowerPoint PPT presentation | free to view
Title: Orthographic Projection Author: slcss Last modified by: MMS User Created Date: 1/3/2005 6:05:29 AM Document presentation format: On-screen Show
| PowerPoint PPT presentation | free to view
Viewing/Projection V, Vision/Color Week 5, Mon Feb 1 http://www.ugrad.cs.ubc.ca/~cs314/Vjan2010
| PowerPoint PPT presentation | free to download
CHAPTER 8 Multiviews Runouts Line Precedence Object lines take precedence over hidden lines and centerlines Hidden lines take precedence over centerlines Cutting ...
| PowerPoint PPT presentation | free to view
Speech recognition in MUMIS Judith Kessens, Mirjam Wester & Helmer Strik Manual transcriptions Transcriptions made by SPEX: orthographic transcriptions transcriptions ...
| PowerPoint PPT presentation | free to download
Drafting Product Design & Architecture Orthographic Projection
| PowerPoint PPT presentation | free to download
2D Standard Drawings (Orthographic Projections) Select new file 2D Standard Drawings 2D Standard Drawings 2D Standard Drawings 2D Standard Drawings 2D Standard ...
| PowerPoint PPT presentation | free to view
National 5 Graphic Communication EXAM KNOWLEDGE Line Types, Drawing Types, British Standards and Dimensioning Line Types Line Types Construction Outline Hidden Centre ...
| PowerPoint PPT presentation | free to download
Perspective Projection Perspective Projections Perspective drawing differs from axonometric projection & oblique projection in that ...
| PowerPoint PPT presentation | free to view
ENGG1100 Introduction to Engineering Design Introduction to Engineering Drawing Professor Yunhui Liu Dept. of Mechanical and Automation Engineering
| PowerPoint PPT presentation | free to download
Objectives Short Review Session In Class Project Alphabet of Lines Alphabet of Lines Drawing Scale construction projects are drawn to a reduced scale scale is defined ...
| PowerPoint PPT presentation | free to download
Forging new generations of engineers Auxiliary Views An auxiliary view is an orthographic projection of an angled surface on an object, which appears foreshortened in ...
| PowerPoint PPT presentation | free to download
This is a very basic 3-view, Orthographic Projection FRONT East High School Name: Title: Orthographic Projection TOP RIGHT SIDE
| PowerPoint PPT presentation | free to download
Forging new generations of engineers Auxiliary Views An auxiliary view is an orthographic projection of an angled surface on an object, which appears foreshortened in ...
| PowerPoint PPT presentation | free to download
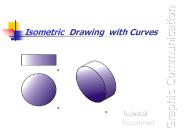
Graphic Communication Isometric Drawing with Curves Technical Department
| PowerPoint PPT presentation | free to download
Notes on the Harris Detector from Rick Szeliski s lecture notes, CSE576, Spring 05 Harris corner detector C.Harris, M.Stephens. A Combined Corner and Edge ...
| PowerPoint PPT presentation | free to download
chap7. manipulating 3d space (coordinate transformations)
| PowerPoint PPT presentation | free to download
Verbos en el pret rito Orthographic Changes Recuerdas The Spanish language is phonetically based, words sound exactly as they are spelled. Hay muchos verbos en ...
| PowerPoint PPT presentation | free to download


