
Rip vs. Cross-Cut - PowerPoint PPT Presentation
1 / 33
Title:
Rip vs. Cross-Cut
Description:
Title: THICKNESS PLANER SAFETY Author: Fraser Burton Last modified by: Duitsmank Created Date: 2/7/2006 9:25:04 PM Document presentation format: On-screen Show (4:3) – PowerPoint PPT presentation
Number of Views:115
Avg rating:3.0/5.0
Title: Rip vs. Cross-Cut
1
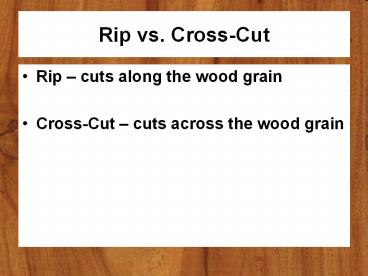
Rip vs. Cross-Cut
- Rip cuts along the wood grain
- Cross-Cut cuts across the wood grain
2
THICKNESS PLANER SAFETY
3
SPECIFIC PURPOSE
- To surface stock to desired thickness.
4
SPECIFIC SAFETY RULES
- Stock must be at least 12 long to go through the
GENERAL planer and at least 8 long to go through
the DeWALT planers. - Plane thickest board first. Never plane more than
one thickness at a time.
5
Specific Safety Cont
- Never stand directly behind, always off to one
side in case of kick back. - Let go of the stock the board after it starts
through the planer. - Never look into the planer.
6
USEFULL TIPS
- Measure the thickness of your stock and adjust
the planer to remove 1/16 of material thickness. - The JOINTED or SMOOTH face of your stock must be
facing DOWN when you plane for the first time. - Rotate the hand wheel on the side of the planer
by 1/3 of a turn to reduce stock thickness until
proper thickness is achieved.
7
Useful Tips Cont
- When planing short pieces (ie. 16 to 12) put
the pieces through end to end so they push each
other through the planer. - Plane all your stock at the same time to ensure
equal thickness. - Ask for a help when planing long boards.
- Check your stock for nails and loose knots.
8
Why is a thickness planer not able to straighten
a warped board?
- BECAUSE..
- The Cutterhead is mounted above the table.
- Only the top of the stock is surfaced.
9
Briefly explain how FEED SPEED affects surface
finish?
- Faster feed fewer knife marks/inch
- rougher surface quality
- Slower feed more knife marks /inch
- smoother surface quality
10
THICKNESS PLANER
Cutter Head (Hidden by Guard)
Depth of Cut Gauge
Table Elevation Hand Wheel
On/Off Switch
- Table
11
HOW A THICKNESS PLANER WORKS
Cutter Head
In Feed Roller
Out Feed Roller
Feed Direction
Stock
Table
12
Jointer
13
Overview
- Used to true the edge of a board
- 2nd machine in procedural order
14
Fence
Blade Swing Guard
Outfeed Table
Infeed Table
On/Off Switch
15
How long is my board?
Needs to be 10 or longer
16
Depth of cut should
NOT exceed 1/8
17
Keep the swing guard
over the blades
18
Pick one edge to joint
19
Always wear your safety glasses
20
Turn the jointer on
Press the GREEN button
21
Push it through smoothly
Repeat as needed
22
Now your board has
a smooth edge
23
Turn the jointer off
Press the RED button
24
Danger!!
Use a Push Stick!
25
Safe!!
Use a Push Stick!
26
Safe to use hands if
board is higher than fence
27
Danger!!
Do NOT joint end grain
28
The end splits out
Do NOT joint end grain
29
Danger Overview
- Using stock thats width is less than the height
of the fence without a push stick. - Using stock that is less than 10 inches long.
- Removing more than 1/8 of an inch per pass.
- Standing directly behind the woodpossible
kickback
30
Before you start
- answer these questions
- How long is my board?
- Which edge do I want to joint?
31
Review
- What is the minimum length of stock to be run
through the jointer? - 10 inches
- How much material may be removed in one pass?
- 1/8 of an inch
- Should both edges be jointed?
- No, the edges wont be parallel
32
Review
- What is the margin of safety?
- 4 inches
- When do you use a push stick?
- If the boards width is less than the fences
height - Where should the guard be?
- Over the blade
- Should end grain be jointed?
- No, the ends will chips
33
Questions?Comments?
Recommended
CrystalGraphics Presentations


