Orthographic Projections PowerPoint PPT Presentations
All Time
Recommended
Orthographic Projections. Third Concept in DDP. Definitions. Two- Dimensional ... Orthographic Projections. An orthographic projection is a way to represent a ...
| PowerPoint PPT presentation | free to view
2D Standard Drawings (Orthographic Projections) Select new file 2D Standard Drawings 2D Standard Drawings 2D Standard Drawings 2D Standard Drawings 2D Standard ...
| PowerPoint PPT presentation | free to view
... lines are used to represent hidden features. The length of the dash can vary based on drawing size. Drawing Conventions for Hidden Lines are shown on the next ...
| PowerPoint PPT presentation | free to view
There are 2 broad types of parallel projections: Orthographic ... Oblique Projections ????. Axonometric ?????. Isometric ???????. Orthographic Projections ...
| PowerPoint PPT presentation | free to view
Parallel Projections Parallel Projections There are 2 broad types of parallel projections: 1. Orthographic Projections Front, Side, Top ...
| PowerPoint PPT presentation | free to view
Projections - bhecker.com ... Projections
| PowerPoint PPT presentation | free to download
size and shape in orthographic views. GOOD. STEP 2 : Select a Front View ... GOOD. Example : View selection. Shape description. Size description. F.V. W. D. W ...
| PowerPoint PPT presentation | free to view
Map Projections - SchoolRack.com ... Map Projections
| PowerPoint PPT presentation | free to download
Orthographic Projection ( ) ( ...
| PowerPoint PPT presentation | free to view
Orthographic projections (will use in lab a little, less ... Can use azimuth (200 degrees) or geographic (S20W) with stereonets. A NS plane ....and its pole ...
| PowerPoint PPT presentation | free to view
Orthographic Projection Sectional Views Section Views When a part has a lot of interior details, hidden lines can make the part hard to understand and dimension.
| PowerPoint PPT presentation | free to download
Orthographic Projection Detail Views Detail Views A drawing of an individual part that contains all the information needed to manufacture the object is referred to as ...
| PowerPoint PPT presentation | free to download
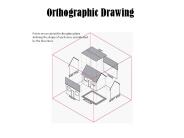
Orthographic Drawing Points are projected to the glass plane defining the shape of each view, as indicated by the blue lines Projection Plane The layout as shown here ...
| PowerPoint PPT presentation | free to download
Graphic Communication Orthographic Views CDT Department Orthographic Projection Orthographic projection is the name given to the type of drawing where a 3D object is ...
| PowerPoint PPT presentation | free to view
Orthographic Views Orthographic projection is the name given to the type of drawing where a 3D object is drawn as 3 different 2D views. These views are called the ...
| PowerPoint PPT presentation | free to view
Orthographic Projection Auxiliary Views Auxiliary View To accurately view the true dimensions of an inclined surface, one must create a view at 90 degrees from that ...
| PowerPoint PPT presentation | free to download
Title: Model Documentation Author: Edison Engineering Department Last modified by: waddd Created Date: 7/17/2000 2:48:51 PM Document presentation format
| PowerPoint PPT presentation | free to download
Map Projections (1/2) Francisco Olivera, Ph.D., P.E. Center for Research in Water Resources University of Texas at Austin Overview Geodetic Datum Map Projections ...
| PowerPoint PPT presentation | free to view
Orthographic Drawings What does the word Orthographic Mean? Ortho 90 Degrees or right angle Graphic to draw or a picture To draw pictures 90 degrees from each ...
| PowerPoint PPT presentation | free to view
EXAMPLE C SELF PEACTICE * Definition TOPICS Orthographic Reading Missing View Problems Self Practice Problems ... An understanding in orthographic projection, ...
| PowerPoint PPT presentation | free to view
ORTHOGRAPHIC PROJECTION HOW TO LAYOUT YOUR DRAWING VIEWS FIRST-ANGLE PROJECTION The U.S. and Canada uses Third-Angle Projection. The rest of the world uses first ...
| PowerPoint PPT presentation | free to view
Over the Equator (often used for world maps) ... Commonly used for world reference maps, eg Mercator, Lambert Conformal Conic, etc. ...
| PowerPoint PPT presentation | free to view
ORTHOGRAPHIC PROJECTION Orthographic projection is the organization of multiple views of an object. In order to fully and accurately represent the object, more than ...
| PowerPoint PPT presentation | free to view
Each square unit on the graph. paper should represent how many inches? ... 5. Using engineering graph paper, scales, and appropriate drawing utensils, sketch the ...
| PowerPoint PPT presentation | free to view
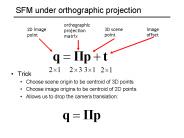
DoP = [CW-PRP] = ( (vmax vmin)/2 - PRPv ) ( 0 - PRPn ) ( 1 ) ... this direction of projection and shear it to the z-axis , DoP' = [0, 0, DoPz] ...
| PowerPoint PPT presentation | free to view
Coatbridge High School Orthographic to Isometric Drawing the Plan and Elevations Drawing a crate Cutting out parts of the crate Cutting out parts of the crate ...
| PowerPoint PPT presentation | free to view
Orthographic projection is used for working drawings it is essential that the sizes or dimensions are placed onto the drawing. To keep the drawing in proportion the ...
| PowerPoint PPT presentation | free to view
This shows the correct layout for the three orthographic views. Drawing No 2. House ... Binoculars. Which of the four views shows the correct Elevation ...
| PowerPoint PPT presentation | free to view
Orthographic Projection 'COPY' Representational drawing and sketching: ... An orthographic projection drawing - since it is a 'flattened single view' of a ...
| PowerPoint PPT presentation | free to view
It is the means by which spatial data from different sources can be integrated ... Azimuth. Azimuth = angle between starting point of a line and north ...
| PowerPoint PPT presentation | free to view
in which the parallel lines of sight are perpendicular to the. projection plane. ???????? ... ????????????????????. Freehand drawing. Example. Example. ?????????????? ...
| PowerPoint PPT presentation | free to view
Longitude Meridians Converge at the Poles. Parallels & Meridians ... a 'RHUMB' line -- using a Compass. on a Globe - Direction is measured as a GREAT CIRCLE ...
| PowerPoint PPT presentation | free to view
Calculate the latitudes of 3 intermediate points, starting from A, with 5 ... Calculate the azimuth and the length of the rhumb line from P1 to P2 (on the sphere) ...
| PowerPoint PPT presentation | free to view
Title: Geodesy and Map Projections Author: Jude A. Benavides Last modified by: rgordon Created Date: 1/28/2004 8:29:42 PM Document presentation format
| PowerPoint PPT presentation | free to view
Geoid is a surface of constant gravity. Topographic surface. Ellipsoid. Sea surface ... Elevation is measured from the Geoid. Standard Vertical Geodetic Datum ...
| PowerPoint PPT presentation | free to view
Is this a good map of the Earth? How about this? The Answer It depends A good map is one that is being successfully used for its intended purpose and was ...
| PowerPoint PPT presentation | free to download
Orthographic Drawing Practice GSMST * Front View Right Side View Top View Creating the Orthographic Projection Sketch * Step 1 Lightly Block Three Views Use very ...
| PowerPoint PPT presentation | free to view
... on the picture to play video. Orthographic Projection. of Object Features ... Leave the gap when centerline forms a continuation with a visible or hidden line ...
| PowerPoint PPT presentation | free to view
Laurie Garo, Map Projections module, in Virtual Geography Department, U. of ... Often used for world maps. Pseudocylindrical Projection. Pseudocylindrical Projection ...
| PowerPoint PPT presentation | free to view
Orthographic Projection Multi-View Drawing. Orthographic Projection. a system of drawing views of an object using perpendicular projectors from the ...
| PowerPoint PPT presentation | free to view
a system of drawing views of an object using perpendicular projectors from the ... Avoid erasing. as new ideas are developed make new sketches ...
| PowerPoint PPT presentation | free to view
... face detection Here, X is an image region dimension = # pixels each face can be thought of as a point in a high dimensional space H. Schneiderman, ...
| PowerPoint PPT presentation | free to download
This means the point can not be fixed in space until another reference plane is used. ... The coordinates appear on each plane in this manner. 22 ...
| PowerPoint PPT presentation | free to view
Orthographic, Isometric, Sectional Drawing
| PowerPoint PPT presentation | free to download
A 'good' map is one that is being successfully used for its intended purpose and ... WGS84 (World Geodetic System of 1984) uses GRS80, almost the same as NAD83 ...
| PowerPoint PPT presentation | free to view
... AAABACADAEAFAGAHAIAJAKALAMANAOAPAQARASATAUAVA!gSSSSSSSSSSSSSSaS SGSpSSSsS S tSFST ... a G p S s t F w ...
| PowerPoint PPT presentation | free to view
(eyex, eyey, eyez): Coordinates of the camera (eye) location in the world coordinate system ... glFrustum(left,right,bottom,top,near,far) ...
| PowerPoint PPT presentation | free to view
PROJECTIONS OF LINES, PLANES AND AUXILIARY PROJECTIONS Three views, viz., front, top and side views of an object are some times not sufficient to reveal complete ...
| PowerPoint PPT presentation | free to download
Conformal: maintains angular relationships and accurate shapes over small areas. ... Shape - local angles are shown correctly (Lambert Conformal Conic) ...
| PowerPoint PPT presentation | free to view
We must locate a hinge line parallel to one of the oblique lines and project it into that plane. ... F, P, and any auxiliary view hinged to the Horizontal plane. ...
| PowerPoint PPT presentation | free to view
Complete the ORTHOGRAPHIC DRAWING of the pyramid by drawing ... The Louvre, PARIS. TARGETS. SELF. TEACHER. Overall neatness. How accurate ? Faint construction ? ...
| PowerPoint PPT presentation | free to view
In this week and next week, we will ... c) the view volume is the parallelepiped. 2D Drawing (cont. ... rectangle in 3-space ( parallelepiped) that extends from ...
| PowerPoint PPT presentation | free to view
OpenGL uses the modeling part of the model-view matrix to convert from the ... Cavalier. DOP makes 45deg. angle with the proj. plane. Cabinet: DOP makes a 63.4deg. ...
| PowerPoint PPT presentation | free to download
It is necessary to describe every part of an object. ... When hidden lines cross (Fig. C), the nearest hidden line has the 'right of way. ...
| PowerPoint PPT presentation | free to view
Ruler. Line Weight. Object lines Dark. Hidden Lines Medium. Guidelines Very Light ... Trace two boxes on white side of paper with ruler. Boxes. Wheels ...
| PowerPoint PPT presentation | free to view
... empirically, that is, it is measured (from boats, planes, and autos) ... It is this geoidal variation that is the caused different ellipsoids to be used) ...
| PowerPoint PPT presentation | free to view


