
P' 1 - PowerPoint PPT Presentation
1 / 48
Title:
P' 1
Description:
IF possible scan to 16-bit greyscale. Ensure scanner settings. deliver a histogram. showing even ... In the real world, the resolution that we achieve is ... – PowerPoint PPT presentation
Number of Views:24
Avg rating:3.0/5.0
Title: P' 1
1
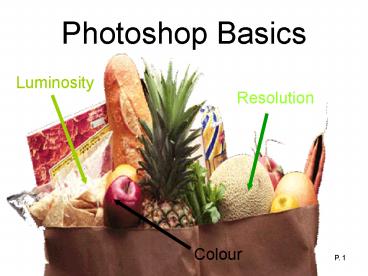
Photoshop Basics
2
Luminous Range
- To retain the highest range of luminosities at
EACH conversion.
3
Luminous Range
- Use the best image sources
- IF possible scan to 16-bit greyscale
- Ensure scanner settingsdeliver a histogram
showing even distribution over the full range. - Scan the image
- to the highest
- resolution
- you can
4
Colour
- The colour that you SEE is influenced by
- Any funny desktop coloursor artificial light
5
Resolution
- In the real world, the resolution that we achieve
is governed by - Focus
- Resolving power of lens
- Camera Shake
- Heat Haze
6
Scanner
- Always control the dynamic range of each colour.
- Never over-saturate.
7
Conclusion
- Never throw information (colour or resolution
away) unless CROPPING
8
All pictures are composed of pixels
9
All pictures are composed of pixels
10
Binning and Histograms
First count the number of black pixels
11
Binning and Histograms
Next count the number of dark grey pixels
12
Binning and Histograms
Repeat for all shades of grey
13
Binning and Histograms
Note the fact that, as there are equal numbers of
shades 1 and 2, this produces a flat top
mountain.
14
Histograms
- In Photoshop there are 256 bins per colour (R,G
and B) represented over 256 pixels. - In a typical picture there may be 3M pixels and
this is represented by the area of the histogram.
0
255
3M
15
Some Typical histograms
NormalCentre weightedClearly drops to zero at
both ends.
16
Some Typical Histograms
High KeyLight end weightedBut still clearly
drops to zero at both ends.
17
Some Typical Histograms
Low KeyDark end weightedBut still clearly drops
to zero at both ends.
18
Perfect Exposure
Data in the histogram is totally contained within
the box at light and dark ends.
19
Perfect Exposure - Highlights
- The acid test of perfect exposure is that fine
detail is revealed in the highlights when the
light end of the curve is pulled dramatically
down. - The bias of the histogram shifts to the dark end.
20
Perfect Exposure - Shadows
- The acid test of perfect exposure is that fine
detail is revealed in the shadows when the dark
end of the curve is pulled dramatically up. - The bias of the histogram shifts to the light end.
21
Over Exposure
Data in the histogram is clearly off scale at
light end.
22
Over Exposure - Highlights
- The acid test of OVER exposure is that fine
detail is LOST in the highlights when the light
end of the curve is pulled dramatically down.
23
Under Exposure
Data in the histogram is clearly off scale at
dark end.
24
Under Exposure - Shadows
- The acid test of UNDER exposure is that fine
detail is LOST in the shadows when the dark end
of the curve is pulled dramatically up.
25
The Perfect Image
- The histogram (Combined Luminosity) would look
like this
26
The Perfect Image
- The RED histogram would look like this
27
The Perfect Image
- The GREEN histogram would look like this
28
The Perfect Image
- The BLUE histogram would look like this
29
The Im-Perfect Image
- Contrast Range too HIGH
30
The Im-Perfect Image
- Contrast Rangetoo BIASEDto High Key
31
The Im-Perfect Image
- Contrast Rangetoo BIASEDto Low Key
32
The Im-Perfect Image
- Contrast Range too LOW
33
The Im-Perfect Image
- Low Key,High Key butLow Contrast
34
The Im-Perfect Image
- Colour Cast
35
Too Much Flash
Open the picture of too much flash
36
- Copy the photo layer
- Change the layer mode from Normal to Multiply
37
Layer mask icon
- Add a black layer mask
- Press Alt Key and click the Layer Mask icon
- Change Foreground colour to white.
38
- Choose a soft edged brush, paint over the
foreground area in the photo
39
After
Before
40
Fixing Underexposed Photos
41
- Duplicate background layer (Control-J)
- Change Blend Mode from Normal to Screen. This can
lighten the photo
42
- It still not properly exposed.
- Copy the layer until the exposure looks about
- right (by press Control-J)
43
After
Before
44
Dodging and Burning Done Right
- Add some highlight of the temple
- Darken the water and sky
45
- Create a new layer
- Change the mode to Overlay
- And click the box fill with Overlay-neutral
color
46
- Switch to Brush tool, choose a large soft-edged
brush, go to options bar and lower the Opacity to
approximately 30 - Change the foreground color to black (or press
d) - Paint over the areas that you want to darken
- Change the foreground color to white (or press
x) - Paint over the areas that you want to do
lightening
47
(No Transcript)
48
QUESTION AND ANSWER
End
Recommended
CrystalGraphics Presentations


