3D Wall Panel Installation - PowerPoint PPT Presentation
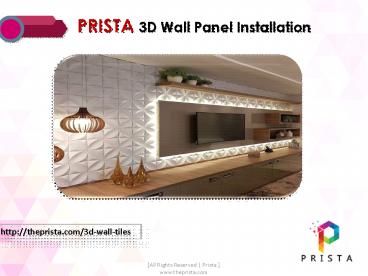
3D Wall Panel Installation
3D wall panel is an ideal wall covering products that can be used in interior and exterior decoration. 3D Wall Panel is an exciting range of decorative textured wall panels with patterns etched into their surface. – PowerPoint PPT presentation
Title: 3D Wall Panel Installation
1
PRISTA 3D Wall Panel Installation
http//theprista.com/3d-wall-tiles
2
PRISTA 3D Wall Panel
- Prista 3D Wall Panels is handy and easy to
install using the supplied tile spacers. You can
easily fix Prista 3D Wall Panel to them with
Adhesive to almost any surface. - Besides creating a stunning visual effect for the
wall, the 3D wall panel can also be made into
furniture, such as cabinet doors, headboard,
bedroom cabinets and kitchen cabinets.
http//theprista.com/3d-wall-tiles
3
3D Wall Panel Installation Steps
Before you are going to install the tiles, Clean
and free of loose paint on the surface.
1
2
Plan ahead the layout of the panels on the wall.
3
Using a level you may draw the panels on the wall
before installing them.
4
Apply glue on wall and 3d wall panel
http//theprista.com/3d-wall-tiles
4
3D Wall Panel Installation Steps
First install the full 3d wall panels, do all the
cutting at the end.
5
6
Prime panels.
7
Use the sand able drywall compound to fill the
gaps between panels and sand them smooth.
8
Apply coat of primer over the joints and paint
the 3d wall panel.
http//theprista.com/3d-wall-tiles
5
Prista - 3D Wall Panel Gallery
http//theprista.com/3d-wall-tiles
6
Prista - 3D Wall Panel Gallery
http//theprista.com/3d-wall-tiles
7
For More 3D Wall Panel Features Check in
http//theprista.com/3d-wall-tiles
THE PRISTA 4B, 2nd Floor, Nearby Carnival Crown
Apartment, Ganapathy, Bharathi Nagar,
Coimbatore, Tamil Nadu -641006
http//theprista.com/3d-wall-tiles
support_at_theprista.com 9585125914
PowerShow.com is a leading presentation sharing website. It has millions of presentations already uploaded and available with 1,000s more being uploaded by its users every day. Whatever your area of interest, here you’ll be able to find and view presentations you’ll love and possibly download. And, best of all, it is completely free and easy to use.
You might even have a presentation you’d like to share with others. If so, just upload it to PowerShow.com. We’ll convert it to an HTML5 slideshow that includes all the media types you’ve already added: audio, video, music, pictures, animations and transition effects. Then you can share it with your target audience as well as PowerShow.com’s millions of monthly visitors. And, again, it’s all free.
About the Developers
PowerShow.com is brought to you by CrystalGraphics, the award-winning developer and market-leading publisher of rich-media enhancement products for presentations. Our product offerings include millions of PowerPoint templates, diagrams, animated 3D characters and more.


