
Message Manager - PowerPoint PPT Presentation
1 / 31
Title:
Message Manager
Description:
You will now receive an e-mail to the address you entered at the beginning of this process. ... a detailed list of all email addresses. Broadcast Details ... – PowerPoint PPT presentation
Number of Views:41
Avg rating:3.0/5.0
Title: Message Manager
1
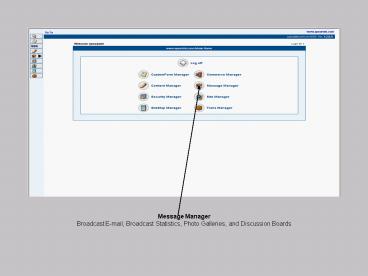
- Message Manager
- Broadcast E-mail, Broadcast Statistics, Photo
Galleries, and Discussion Boards
2
- Broadcast E-mail
- The Broadcast Email tool allows you to send a
graphically rich HTML email or plain text email
to numerous recipients. These recipients can come
from different sources like existing users on the
site, your own email list, customers that
purchased through the site, or data gathered from
a custom form used on the site.
3
- The Broadcast email process begins in the content
management tool. Using an email broadcast
specific template, the email broadcast is created
just like a regular content page. Above is an
example.
4
- Once you have made changes, click save and return
to the Message Manager broadcast email.
5
- Sender Information -Broadcasts are tracked by
their Name so the same subject can be used back
to back if desired. Broadcasts can have the same
Name if you wish for multiple mailings to be
logged under the same statistics. Be sure to use
a real email address for the From Email Address,
as you will be getting a confirmation email at
this address to authorize the broadcast. Your
physical address is now required, due to SPAM
regulations. It will be included at the bottom of
your broadcast. - When you have completed all required fields on
this form click next
6
- HTML Page to Send- After you have created the
page in the Content Manager, it should appear in
this drop down list of all the pages available on
the site. Select it here to use in the HTML
Email. The drop down list of pages on the site
can also be filtered to help in locating the
intended page for use. Below that a preview will
appear of how the email should look when it's
sent. In addition, you may provide BOTH an HTML
page and a plain text message, so that users
without the capability to read HTML emails will
still be able to receive your message. - When you have selected and previewed the
broadcast click NEXT.
7
- Variable Replacement - This feature allows you to
add personalization to your email broadcast. With
this feature you can include information about
the person receiving the email within the email
or subject line. For instance, if you wish to
place the person's name and job title in the
email, in a single spot or multiple spots, all
you would need to do is develop the email as you
normally would but in the area where you want to
include personal information add the variable
identifier. Variables act as placeholders within
the email and are not limited in what you can
name them, but they do have pretty strict
formatting requirements. Variable names should
consist of alphanumeric characters (spaces are
allowed) and whatever you decide to name it, must
be placed in between an open bracket with an
ampersand "_at_" and a closing bracket "". So if
you wanted to create a variable called "Name" to
be the placeholder for the person's name, then it
would look like this "_at_Name". - In the example above NO VARIABLE REPLACEMENT
was selected, so in this case, you skip over this
step and click NEXT.
8
- Message Recipients - recipients for an email
broadcast can be gathered from an unlimited
number of sources. Sources for email lists
include CSV files, custom forms, current
members/users of your website, and eCommerce
customers. Customers can be filtered based on
what products they bought. It is also possible to
select multiple lists of a single source. A
valuable feature of our system is that if an
email address is included in multiple lists, the
broadcast will not duplicate email that person.
9
EMAIL LISTS (.CSV FILES) Creating Email
ListsCreating an email list is quite simple, but
it must adhere to a few criteria. Imported email
list files must be formatted a specific way for
them to be accepted by the SpearTek platform.
Microsoft Excel would be the best application to
use for completing this task.First, the file
must contain separated columns, or at the very
least one for the persons email address. The
first row must act as the "Header" row using
titles to describe the data contained within that
column. This must be done so the platform will
know how to handle the specified data. It is to
also help you in configuring your email broadcast
should you decide to take advantage of variable
replacement. The screenshots in the subsequent
section help to illustrate this by defining a
column for the user's Name and one for their
Email address.Then, none of the columns can
contain a comma. So in the case of someone's name
being listed as "Doe, John" or they have multiple
email address assigned to them,
"johndoe_at_mysite.com, jdoe_at_newsite.net, the comma
would need to be removed from both columns. If a
single user wishes to receive the broadcast email
at two separate addresses then they would need to
be put in on two different rows.Finally, once
the file is formatted correctly it must be saved
as a .CSV file. To do this select File from the
menu bar, select Save As, and for the "Save as
type " select "CSV (comma delimited)". Excel
should automatically add .csv to the name of your
file so click "Save" and youre ready to put it
to the Excel/Notepad test.
10
Excel / Notepad Test
- Now that you have the file you can validate it
before putting it on the server. Open the file up
in both Microsoft Excel and Notepad and if it
looks like (or has close similarity) the two
screen shots above then you're all set. Note that
the Excel view (top) will look similar to an
actual Excel file, but will not contain any
formatting. When viewing it in Notepad
(bottom) you should see the two column headings
(and its associated rows) separated by a comma
with one record on every row. - Once your file is ready - Click Next.
11
- After you click Add List in the Message
Recipients box. You will continue to this screen
where you will then choose from the drop down box
the source for the e-mail addresses will be
coming from for this broadcast e-mail. - Select the CSV File and then click NEXT.
12
- In this screen, you will hit the Select a file
button and this pop-up window will appear. Here
you will select the name of the CSV files
already on server or you can click and browse to
upload files directly from your computer.
13
- Once you have selected your email list the title
of that CSV file will appear in your source
box. Click NEXT.
14
- In this screen make sure you select Header Row
if the top row of your CSV file includes Name
Email (as shown above). Also, make sure the
values match up by making a selection from the
drop down. - When you have made these two selections from the
drop downs, click NEXT.
15
- The next example will be selecting ecommerce
customers to include in the broadcast.
16
- You can sort through customers by certain
products they have purchased.
17
- Make sure the values match up by making a
selection from the drop down. - When you have made these two selections from the
drop downs, click NEXT.
18
- The final example, will be selecting Custom
Form (catalog requests, newsletter sign-ups,
etc.) to include in the broadcast.
19
- Here you select the name of the Custom Form
recipient list you want to choose. Then click
next.
20
- Once again, you want to match the values on
this screen and to continue, click next.
21
- This screen will give you one more chance to add
any more recipients to your e-mail list. If you
have completed the list and are ready to move
forward with the broadcast. Press the Finish
button.
22
- After you hit Finish, This page will let you
know that your broadcast has been prepared
successfully. You will now receive an e-mail to
the address you entered at the beginning of this
process.
23
- If this were the inbox of you e-mail folder, this
is what your confirmation e-mail would look like.
To authorize this, CLICK HERE and your e-mail
will be sent! - This completes the broadcast process!
24
- This is what the broadcast email will look like
when opened by those who received it.
25
- Once you have sent out an email broadcast the
broadcast statistics provide information about
any given email broadcast sent from your site.
These statistics are tracked by the broadcast
name that's specified when a new broadcast is
created and includes the number and percentage
of emails successfully delivered, failed, viewed,
and clicked through.
26
- The Broadcast Summary Display lists all the
broadcast sent from your site along with the date
it was sent. Keep in mind that if you chose to
group multiple broadcast under the same name, the
"Broadcast Started" date will remain the same as
when the initial broadcast using that name. You
can view the details of a broadcast by clicking
the magnifying glass to the left of the name - You can search for a specific broadcast by typing
the title into the search box.
27
- The first four items all have the ability to
display the actual email addresses that fall into
those respective categories. Clicking "(View
Emails)" will display a detailed list of all
email addresses. - Broadcast Details
- Emails Delivered The total number of emails
successfully delivered and received by the user. - Emails Failed The total number of emails that
were not delivered, due to invalid address,
duplicate email records, or communication failure
with the recipients email server. - Emails Viewed The number of emails that have
actually been opened and viewed by the recipient. - Emails Clicked Through The number of recipients
that clicked a link contained within the email to
continue to your site.
28
- Message manager
- The Message Manager tool helps you manage any
discussion boards contained on your site.
Discussion boards require user login, and can be
grouped based on interest, topics and threads
within each defined group to those topics. - For more information please contact our sales
department.
29
- Gallery Manager
- The Gallery Manager is for photo galleries
slide shows. - For more information, please contact our sales
department.
30
- Assign Message Topics
- Under Message Topics you can create interest
groups to help categorize information displayed
in discussion boards photo galleries.
31
- This completes the admin demonstration for the
message manager. - If you have any questions please contact our
Sales Department.
Recommended
CrystalGraphics Presentations


