Two Point Perspective - PowerPoint PPT Presentation
1 / 14
Title:
Two Point Perspective
Description:
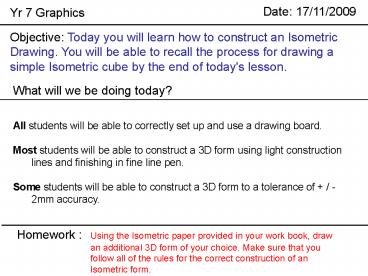
Homework : Using the Isometric paper provided in your work ... Make sure that you follow all of the rules for the correct construction of an Isometric form. ... – PowerPoint PPT presentation
Number of Views:127
Avg rating:3.0/5.0
Title: Two Point Perspective
1
Yr 7 Graphics
Objective Today you will learn how to construct
an Isometric Drawing. You will be able to recall
the process for drawing a simple Isometric cube
by the end of today's lesson.
What will we be doing today? All students will
be able to correctly set up and use a drawing
board. Most students will be able to construct
a 3D form using light construction lines and
finishing in fine line pen. Some students will
be able to construct a 3D form to a tolerance of
/ - 2mm accuracy.
Homework Using the Isometric paper provided in
your work book, draw an additional 3D form of
your choice. Make sure that you follow all of
the rules for the correct construction of an
Isometric form.
2
Yr 7 Graphics
Vocab Paraline Isometric Angles Constructio
n Lines Vertical Parallel Datum
3
Yr 7 Graphics
Paraline Isometric Projection
Isometric Projection
In isometric projection all vertical lines on an
object remain vertical while horizontal lines are
drawn at 30 to the horizontal.
Isometric drawings are usually produced with
drawing equipment to ensure accuracy.
Their advantage is that they show the object's
dimensions accurately and in correct proportion
to each other, making it easy to draw the
projection correctly to scale from a plan view.
4
Yr 7 Graphics
Paraline Isometric Projection
Equipment
Isometric Triangle
Drawing Board
2H Pencil
5
Stage 1
Yr 7 Graphics
- Set up your drawing board so that a sheet of A3
paper is securely fastened. Using the parallel
motion bar, draw a light construction roughly 1/3
way from the bottom of the page. This line is
called a DATUM line.
Construction Line
Parallel motion bar.
6
Stage 2
Yr 7 Graphics
- Using the triangle draw a vertical construction
line across the centre of the datum line. This
line is called the Leading Edge
Keep the base (short edge) of the triangle tight
to the top of the parallel motion bar and draw a
LIGHT line.
7
Stage 3
Yr 7 Graphics
- Using the triangle draw two 30º lines that disect
the datum line and the leading edge.
Do not draw the lines from the very tip of the
triangle, as this can be less accurate.
8
Stage 4
Yr 7 Graphics
- Using a ruler measure 50mm from the centre point
away from the leading edge and 50mm up the
leading edge.
50mm from vertical leading edge.
9
Stage 5
Yr 7 Graphics
- Using the long edge of your triangle extend two
vertical and parallel line up through the 50mm
markers.
10
Stage 6
Yr 7 Graphics
- Using the 30º angle draw two parallel lines
through the centre 50mm mark away from the
leading edge.
11
Stage 7
Yr 7 Graphics
- Using the 30º angle draw in the back edges of
your cube.
12
Stage 8
Yr 7 Graphics
- Using a Fine Line pen carefully draw in all of
the edges of your Isometric cube.
Be very careful not to smudge the ink as you
apply your ink lines.
13
Yr 7 Graphics
- Task.
- Using the process that you have just used, draw
four more cubes of varying size onto your page.
Different Sized Isometric Cubes.
14
Lesson Feedback Sheet
Date Taught
__18__ / ___09___ / 06____
Success of Lesson
Good.
Improvement Notes
Good lesson, this presentation works well.
Students produced high quality work that
demonstrated a good understanding and grasp of
the principles.


