Hollow Braid Eye Splice - PowerPoint PPT Presentation
Hollow Braid Eye Splice
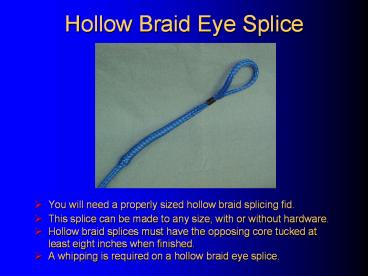
Hollow Braid Eye Splice You will need a properly sized hollow braid splicing fid. This splice can be made to any size, with or without hardware. – PowerPoint PPT presentation
Title: Hollow Braid Eye Splice
1
Hollow Braid Eye Splice
- You will need a properly sized hollow braid
splicing fid. - This splice can be made to any size, with or
without hardware. - Hollow braid splices must have the opposing core
tucked at least eight inches when finished. - A whipping is required on a hollow braid eye
splice.
2
- Insert the working end of the rope into the
hollow end of a properly sized splicing fid. - Form the required size of eye and allow
approximately 18 to 20 of rope from the
junction point of that eye to the splicing fid
(figure 1). - Loosen the braid in the rope at the junction
point of the eye and insert the fid into the
rope (figures 2 2A).
FIG. 1
Junction Point of Eye
18 to 20
FIG. 2A
FIG. 2
3
- Once the fid has been inserted into the rope,
push the fid allowing it to travel down the
hollow center of the braided rope (figure 3). - When the desired length is reached (compressed
fid length) bring the fid out of the center of
the rope (figure 4). - Maintain the eye and extend the outer cover
over the core in the center of the rope until
the braids are tightened (figure 5).
FIG. 3
FIG. 4
FIG. 5
Minimum of 8 inches
4
- After bringing the fid out of the center of the
rope (fig. 6) note the exit point and insert a
back splice into the rope, beginning at the point
where it exits the center of the rope (fig. 7).
Do not exceed the minimum eight inches tucked
into the rope when completing the back splice
(figures 8,9 10).
Exit Point
FIG. 6
FIG. 7
FIG. 8
FIG.9
FIG. 10
5
- When the bight in the end of the back splice
disappears, remove the fid and cut the excess
core of rope to finish the back splice (figure
11).
FIG. 11
FIG. 12
- Grasp the base of the eye when it is properly
sized and slide the outer braids toward the
finished back splice tightening the braids as
you go (figures 12 13).
FIG. 13
6
- A plain whipping is required at the base of the
eye in a hollow braid eye splice (figures 14
15).
FIG. 14
FIG. 15
7
Finished Hollow Braid Eye Splice
Whipping Applied At Base of Eye
Core with Back Splice Tucked A Minimum of 8 to
10
PowerShow.com is a leading presentation sharing website. It has millions of presentations already uploaded and available with 1,000s more being uploaded by its users every day. Whatever your area of interest, here you’ll be able to find and view presentations you’ll love and possibly download. And, best of all, it is completely free and easy to use.
You might even have a presentation you’d like to share with others. If so, just upload it to PowerShow.com. We’ll convert it to an HTML5 slideshow that includes all the media types you’ve already added: audio, video, music, pictures, animations and transition effects. Then you can share it with your target audience as well as PowerShow.com’s millions of monthly visitors. And, again, it’s all free.
About the Developers
PowerShow.com is brought to you by CrystalGraphics, the award-winning developer and market-leading publisher of rich-media enhancement products for presentations. Our product offerings include millions of PowerPoint templates, diagrams, animated 3D characters and more.


