Measuring light transmission through a dichroic material ( - PowerPoint PPT Presentation
1 / 32
Title:
Measuring light transmission through a dichroic material (
Description:
Topics Measuring light transmission through a dichroic material ( polarizer sheet ) as a function of polarization angle to verify Malus Law – PowerPoint PPT presentation
Number of Views:129
Avg rating:3.0/5.0
Title: Measuring light transmission through a dichroic material (
1
Topics
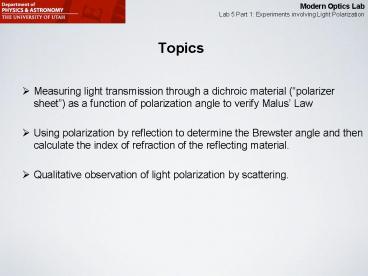
- Measuring light transmission through a dichroic
material (polarizer sheet) as a function of
polarization angle to verify Malus Law - Using polarization by reflection to determine the
Brewster angle and then calculate the index of
refraction of the reflecting material. - Qualitative observation of light polarization by
scattering.
2
Linearly polarized light
3
Dichroic Absorption
Partially absorbed and partially passes
Passes
Is absorbed
4
Dichroic Absorption
Partially absorbed and partially passes
(Malus Law)
5
Polarization Dependent Reflection
Incident plane Plane that contains incident,
reflected and transmitted ray.
6
Polarization Dependent Reflection
Parallel polarized light. (parallel to incident
plane) p-polarized (p as in parallel)
Incident plane Plane that contains incident,
reflected and transmitted ray.
7
Polarization Dependent Reflection
Perpendicular polarized light. (perpendicular
to incident plane) s-polarized (s as in
senkrecht)
Incident plane Plane that contains incident,
reflected and transmitted ray.
8
Fresnel Equations
Reflection Coefficients
Reflection coefficients (relate to Electric field
strength ratios) For parallel polarized
light For perpendicular polarized light
9
(No Transcript)
10
Reflectances (relate to intensity ratios)
11
Brewster angle R0
12
Brewster Angle
Parallel polarized light is not reflected at
all if incident under the Brewster Angle
13
Reflected light is s-polarized under the Brewster
angle.
14
Radiation pattern from an accelerated charge
Radiation is polarized
15
Radiation pattern from an accelerated charge
Length of arrow indicates intensity in that
direction
16
Scattered light
nothing scattered in this direction
incoming light
scattered light
nothing scattered in this direction
17
Scattered light
nothing scattered in this direction
incoming light
scattered light
nothing scattered in this direction
18
Scattered light
polarized
polarized
incoming light- unpolarized
scattered light
19
Rayleigh Scattering
incoming light
20
Intensity of scattered light
incoming light- unpolarized
21
Color of scattered light
incoming light assume equal color intensity
Scattered light
Looking at sunset
Unscattered light
Looking at sky above
22
Experimental Details Using the Photometer to
Measure Intensity
- Zero adjustment
- Start with Sensitivity 1000 (least Sensitive)
- Close off Probe Input with rubber stopper so
that no light enters. - Use Zero Adjust button to get needle to zero.
- Go to more sensitive setting (lower number) and
zero, etc.
10
0
0
3
Zero Adjust
Probe Input
- Measurement of Intensity
- Start with Sensitivity 1000 (least Sensitive)
- Plug fiber optic cable into Probe Input.
- Step by step increase sensitivity but make sure
needle stays within range.
Variable
Sensitivity
300
3
CAL.
1000
1
See pages 19 ff of the Advanced Optics Manual
for detailed operating instructions!!
23
V.A Dichroic Absorption
Is the laser polarized?
Polarizer
Screen
Laser
24
V.A Measuring I(Q) and verifying Malus Law
- Zero Photometer
- Attach fiber optic cable to photometer and to
rotational stage (tighten screw only very lightly
otherwise fiber optic cable may break
internally). Do not bend fiber optic cable too
tightly.
Top view
Polarizer
Laser
- Measure I(Q).
- Plot I(Q) versus cos2Q.
Fiber Optic Cable
Photometer
25
V.A Measuring I(Q) with two polarizers
Polarizer 2
Polarizer 1
Screen
Laser
- Vary the orientation Q1 of polarizer 1.
- Measure I(Q1) plot versus Q1 .
- Explain results.
26
V.B Orienting the laser polarization to be
horizontal
- Rotate laser so that E-vector is horizontal (from
V.A. you should know approximate orientation
already). - With polarizer oriented as shown, fine tune the
laser orientation until light transmission is
minimized.
Top view
Polarizer (0-180 direction vertical)
Laser
Screen
27
V.B Adjusting the glass plate
- Front surface of glass plate should be hit by
laser exactly at the rotation axis of the
rotation stage. - Calibrate the zero degree position by using the
back-reflection of the laser.
Top view
Glass plate
Polarizer (0-180 direction vertical)
Laser
Short component holder
28
V.B Finding the Brewster angle
- Rotate until reflection intensity is minimized to
find the Brewster angle. - Calculate the index of refraction of glass from
the Brewster angle.
Top view
Polarizer (0-180 direction vertical)
Laser
Screen
29
V.B Adjusting the glass plate
- Front surface of glass plate should be hit by
laser exactly at the rotation axis of the
rotation stage. - Adjust 127mm lens so that sharp image of filament
is seen on back side of lens holder. - Adjust glass plate orientation so that filament
image is in the middle of lens holder.
Glass plate
127mm lens
Top view
Incandescent Light
Filament image
Short component holder
Approx.750mm
200mm
Approx.330mm
30
V.B Adjusting lens position and getting Brewster
angle
- Rotate rotational stage by approx. 30 degrees.
- Readjust lens position so that filament is in
focus on the screen. - With polarizer select parallel polarization
component. Look at intensity versus incident
angle. Then do the same for perpendicular
polarization component. - Make a qualitative comparison of I(Q) for the two
components. - Determine the Brewster angle again.
127mm lens
Top view
Incandescent Light
Polarizer
Screen
31
V.C Polarization by Scattering
- Front surface of glass plate should be hit by
laser exactly at the rotation axis of the
rotation stage. - Adjust 127mm lens so that sharp image of filament
is seen on back side of lens holder. - Adjust glass plate orientation so that filament
image is in the middle of lens holder.
Screen
48mm lens
Top view
Incandescent Light
Approx. 4cm
Murky water
Look from side (and look from top) through
polarizer
32
V.C Scattering of polarized laser light
- Look from side (and then from top down).
- Observe scattered light intensity as you rotate
the lasers polarization.
Screen
Top view
Laser
Murky water
Look from side (and look from top) through
polarizer

