Welcome to lesson No. 1 - PowerPoint PPT Presentation
Title: Welcome to lesson No. 1
1
Welcome to lesson No. 1
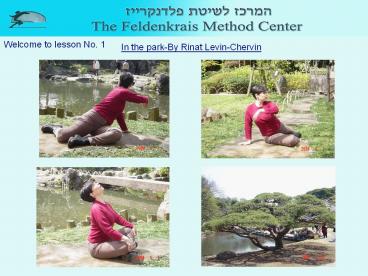
In the park-By Rinat Levin-Chervin
2
Practice a lesson
- The lesson is an interesting, unconventional
sequence of movements. It activates your mind to
work, and brings mobility and healing to far
forgotten areas of your body. - The lesson is performed on a thin mattress.
- Important Be committed to your comfort and well
being. Perform all the movements in this lesson
slowly, softly and gently, and avoid strained
effort. - Gradually, the movements become, by the end of
the lesson, an elaborate functional harmony. - In the beginning of each lesson make a thorough,
head to tow examination/screening of your body.
This will intensify your awareness to the state
of your body and yourself. - During the lesson you are to repeat each
instruction about 7 times, then return, each
time, to your initial position. - Throughout the lesson, make sure your breathing
is continuous and calm. - At the end of the lesson, re-examine/screen your
body. You will note some changes, feel refreshed,
your mood will be improved and you will be aware
of your new abilities.
3
1. Oriental sitting-looking down for examining
the quality of the movement
4
2. Oriental sitting-looking up for examining the
quality of the movement
5
3. Sitting, your knees bend apart from each
other, support yourself with hands
6
4. Move your knees toward the ground, to your
left side till sitting
5. Like this, raise your right hand to shoulder
high, elbow bent, palm relaxed
7
6. Move your right hand to the left, like you
want to look backward, trace with your eyes
the movement of your right wrist 7. Continue the
movement while you look to your right side
backward, your head in the opposite direction to
your right hand.
8
8. Same, to the other direction, knees bent to
the right, left hand in shoulder high
9
9. Continue the movement while you look toward
your left side backward, your head in the
opposite direction to your left hand.
10
10. Again do the movement to the left side as in
picture 7 Notice the participation of your
right side of the pelvic in the movement
Does the lifting and lowering your pelvic from
the ground make the rotation to your
left more efficient?
11
11. Again do the movement to the left side as in
picture 7. Notice what happen now which
didnt before, Is there more easiness and
range of movement Without increasing your
effort?
12
Thank you for joining to our lesson! Have a
wonderful day and see you soon in the next
lesson It is allowed to copy, distribute and use,
with pleasure! You have to stick to the
instruction next to each picture Act according
the preliminary explanation in the
slide-practice a lesson! Do not change! Thank
you
Nestor Levin Rinat Levin Chervin M.Sc. Certified,
expert teachers are happy to respond to any
inquiry on the matter At tel 972-52-5531553 Tele
fax 972-3-9364272 WWW.FELDENKRAIS-CENTER.COM N
ote The information offered in this website is
in no way substitute to medical counseling
and/or treatment

