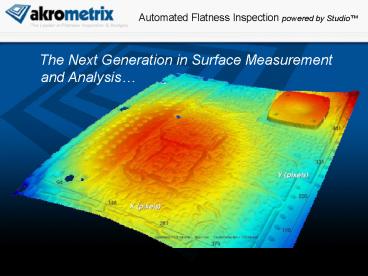
Flatness Inspection
1 / 23
Title: Flatness Inspection
1
The Next Generation in Surface
Measurement and Analysis
2
Agenda January 23, 2009
- Introductions
- RIM PS400 current utilization
- RIM PS400 future DOE requirements
- Studio Software Overview
- Studio Software Highlights (Demo)
- DIC Module Overview
- Rim prior DIC test services review
- Q A
- Next Steps
3
TherMoiré AXP Specifications
- Up to 400 mm x 400 mm maximum sample size
- Acquisition of 1.4 million data points in less
than 2 seconds - Thermal ramp rates up to 2.0 C per second
- Enhanced temperature uniformity convective
heating and cooling - High resolution measurement of small form factor
samples up to 17 mm X 13 mm - XYZ axis strain and CTE calculation
- Increased lab productivity via advanced power
cooling - Support for Reliability testing from minus 55 C
to 150 C and reflow simulation to 280 C - Multiple part testing for increased throughput
4
Studio 4.0 Software
- Core Modules installed on the TherMoiré AXP
include - Studio Manager - seamlessly launches and switches
between modules - Profile Generator - click to create and modify
thermal profiles with machine control - Surface Measurement - simplified data acquisition
and machine actuation - Surface Analysis - process data and make
decisions using 2D and 3D graphical results - Report Generator - create custom-formatted
reports for presenting data and results in
multiple application formats
5
Studio 4.0 Software
- Studio 4.0 Software Modules
- Studio Manager (Core)
- Profile Generator (Core)
- Surface Measurement (Core)
- Surface Analysis (Core)
- Report Generator (Core)
- Shadow Moiré Surface Measurement (Core)
- Micro Fringe Projection (MP10) Surface
Measurement (Add-on) - Digital Image Correlation (DIC) Surface
Measurement (Add-on) - Convective Module (Add-on)
- CoolBoost Module (Add-on)
6
Studio Manager and Surface Analysis Accessible
when using any Studio Module
7
Surface Analysis
- Freedom to Analyze and Compare 2D and 3D data
sets - Control multiple graphs on-screen at once
- Automated Output-of-Edge, Diagonal, 2D and 3D
Displacement plots - Mask areas and burn masks permanently into phase
images - Calculate one displacement data set relative to
another - Export data for further analysis into
computational applications such as ANSYS and
MATLAB - Multiple Chord Plot Analyses
- Draw chord lines across phase images at any angle
- Plot multiple displacement lines on a single
graph - Create and save/load multiple chord sets
8
Surface Analysis Burn masks into phase image
measurement data
9
Surface Analysis User-defined chords for 2D plot
generation
10
Surface Analysis
- Advanced 3D Rendering
- View up to 1.4 million displacement data points
on each graph - 4X the detail of previous graphical renderings
previously hidden surface features are now
visible - Zoom, rotate, crop and export 3D displacement
graphs in multiple formats - Powerful Batch Processing
- Apply masks, filters, chords, rotation and other
operations to hundreds of phase data sets - Multiple output and export options for graphical
and analytical analyses
11
Surface Analysis 3rd Order Polynomial Fit of
Data
Original phase image
Data Subtraction Result
3rd Order Polynomial Fit
LSF Data Rotation
12
Surface Analysis - batch processing interface
13
Micro Fringe Projection (MP10) Module
Specifications
- One 1.4MP Firewire Camera
- Accuracy ? 3.0 of measured value or ? 2.5um,
whichever is greater - Repeatability ? 2.5um
- Data acquisition time of less than 3 seconds
- Field of View 17 mm x 13 mm
- Maximum Sample Size 400 mm x 400 mm
- Minimum Sample Size 0.5 mm x 0.5 mm
- Grating Pitch 168um
14
Micro Fringe Projection (MP10) Module installed
in the TherMoiré AXP
15
Micro Fringe Projections(MP10) 4 x 4 mm PCB BGA
site displacement graph
16
Digital Image Correlation Overview
Image 1
Image 0
Sample
Camera 0
Camera 1
17
Digital Image Correlation Specifications
- 2 x 1.4MP Firewire Cameras 2 x 23mm fixed zoom
lenses - Data acquisition time of less than 1 second
- In-Plane Resolution 0.5 - 1.0 µm (100
microstrain) - Out-of-Plane Resolution 1.0 - 2.0 µm
- Temperature Range 26C to 300C
- Field of Views 45 mm x 34 mm, 66 mm x 48 mm, 88
mm x 66 mm
18
DIC Module installed in the TherMoiré AXP
19
Digital Image Correlation Results 30 mm BGA
strain measurement at 250 C relative to RT
X Strain
Y Strain
20
Digital Image Correlation Results (BGA Z axis
displacement examples)
21
Convective Module Specifications
- Optional 200 mm X 200 mm CM200 module fits
inside the AXP - Heats and cools from -55 C to 300 C
- Automatically controlled by Studio Surface
Measurement - Adjustable heating, cooling and airflow rates
- Heating rates gt 1.25 C per second
22
Convective Module enclosure installed in the AXP
23
TherMoiré AXP


