Create a Seating Chart - PowerPoint PPT Presentation
Create a Seating Chart
On the Insert menu, click New Slide. Copy objects from this ... Discussion Group. Name box. Name box. Name box. Name box. Name box. Name box. Name box. Name box ... – PowerPoint PPT presentation
Title: Create a Seating Chart
1
Create a Seating Chart
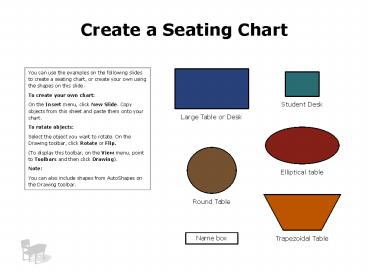
You can use the examples on the following slides
to create a seating chart, or create your own
using the shapes on this slide. To create your
own chart On the Insert menu, click New Slide.
Copy objects from this sheet and paste them onto
your chart. To rotate objects Select the object
you want to rotate. On the Drawing toolbar, click
Rotate or Flip. (To display this toolbar, on the
View menu, point to Toolbars and then click
Drawing). Note You can also include shapes from
AutoShapes on the Drawing toolbar.
Student Desk
Large Table or Desk
Elliptical table
Round Table
Name box
Trapezoidal Table
2
Traditional
Name box
Name box
Name box
Name box
Name box
Name box
Name box
Name box
Name box
Name box
Name box
Name box
Name box
Name box
Name box
Name box
Name box
Name box
Name box
Name box
Name box
3
Discussion Group
Name box
Name box
Name box
Name box
Name box
Name box
Name box
Name box
Name box
Name box
Name box
Name box
Name box
4
Lab Tables
Name box
Name box
Name box
Name box
Name box
Name box
Name box
Name box
Name box
Name box
Name box
Name box
Name box
Name box
Name box
Name box
Name box
Name box
Name box
Name box
Name box
Name box
Name box
Name box
Name box
5
Circle
Name box
Name box
Name box
Name box
Name box
Name box
Name box
Name box
Name box
Name box
Name box
Name box
PowerShow.com is a leading presentation sharing website. It has millions of presentations already uploaded and available with 1,000s more being uploaded by its users every day. Whatever your area of interest, here you’ll be able to find and view presentations you’ll love and possibly download. And, best of all, it is completely free and easy to use.
You might even have a presentation you’d like to share with others. If so, just upload it to PowerShow.com. We’ll convert it to an HTML5 slideshow that includes all the media types you’ve already added: audio, video, music, pictures, animations and transition effects. Then you can share it with your target audience as well as PowerShow.com’s millions of monthly visitors. And, again, it’s all free.
About the Developers
PowerShow.com is brought to you by CrystalGraphics, the award-winning developer and market-leading publisher of rich-media enhancement products for presentations. Our product offerings include millions of PowerPoint templates, diagrams, animated 3D characters and more.


