Flip Hinge - PowerPoint PPT Presentation
1 / 5
Title: Flip Hinge
1
Flip Hinge
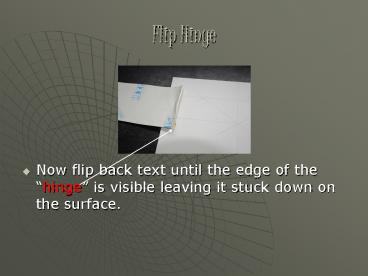
- Now flip back text until the edge of the hinge
is visible leaving it stuck down on the surface.
2
Remove Backing Paper
- Now remove backing paper from vinyl text, do this
slowly and with care, the idea is to leave the
text stuck to the application tape discarding the
heavy non adhesive back paper. (keep it for later)
3
Prepare to Lay
- Once backing is free keep hold of the non hinge
side of text , keeping it held taught to avoid
folding up on its self, bring it over to a height
of roughly 2 cm above surface opposite the hinge
end and hold it there where you will see both
sets of alignment marks starting to line up .
4
Lay The Text
- Now its time to lay the text on to the surface.
If your are applying larger texts (bigger than 50
mm or so) it is recommended to use a fine spray
mist of water onto the back of the text before
laying it down to help with the elimination of
creases and bubbles (A NORMAL HOUSEHOLD SPRAY
BOTTLE IS FINE) do this now before applying text.
Using an applicator such as an old credit card
or similar (a proper applicator will be provided
on request) in your free hand whilst still
holding the text in your other hand, begin by
working your way toward the opposite side of your
text by gradually laying down in a back n
forward motion with the applicator across the
application tape as you go, take your time as
only practise will gain your confidence to get it
done quickly without ruining the job. Once done
you should see all your alignment marks come
together ensuring perfect alignment.
5
Remove Application Tape
- Now its time to remove the application tape from
the text. The idea is to leave the text behind on
the surface discarding the application tape. Go
over the text again with your applicator to make
sure the text is firmly stuck down, If youve
used a water mist you may need to wait 5 or
10mins for text to dry out, then carefully peel
back a corner of the application tape and peel
back over the text until all is removed, its best
to keep the application tape almost flat on the
surface whilst removing it, this help to prevent
the text wanting to stay on its application tape
rather than the surface you want it on.


