Rayco Vacuum Plate Setup Assembly Instructions' - PowerPoint PPT Presentation
1 / 10
Title:
Rayco Vacuum Plate Setup Assembly Instructions'
Description:
Everything to hold Anything. Your single source for Modular Fixtures. ... Make sure that the steel clip on the coupler snaps out to assure leak free vacuum. ... – PowerPoint PPT presentation
Number of Views:64
Avg rating:3.0/5.0
Title: Rayco Vacuum Plate Setup Assembly Instructions'
1
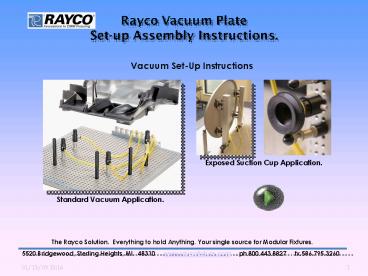
Vacuum Set-Up Instructions
Exposed Suction Cup Application.
Standard Vacuum Application.
The Rayco Solution. Everything to hold Anything.
Your single source for Modular Fixtures.
5520 Bridgewood, Sterling Heights, MI. 48310 ?
www.raycofixture.com ? ph.800.443.8827 ?
fx.586.795.3260
01/13/09 1316
1
2
Included in standard Vacuum Kit.
Vacuum Pump with ON/OFF Part no. R-X10L-VP
Vacuum Manifold, 9 or 13 closed ports, 1 common
inlet. Part no. R-9P-M, R13P-M
Vacuum Hoses, 1-10 Length with straight
barb. Assorted hose lengths depending on the kit
including elbow connections on 1 end.
Vacuum Kits (VCK) come with an organizer
tray. Rayco Part no. R-VCT
Elbow Hose Barbs (3 in bag) Part no. R-PMC2302
The Rayco Solution. Everything to hold Anything.
Your single source for Modular Fixtures.
5520 Bridgewood, Sterling Heights, MI. 48310 ?
www.raycofixture.com ? ph.800.443.8827 ?
fx.586.795.3260
01/13/09 1316
2
3
Set-up Instructions.
1
¼ Quick Disconnect
On/Off Valve
Connect the Vacuum Pump to standard ½ Hose
line. The Male connection at the end of the
Vacuum Pump is a ¼ male quick disconnect. NOTE
The recommended psi is optimal at 57psi
The Rayco Solution. Everything to hold Anything.
Your single source for Modular Fixtures.
5520 Bridgewood, Sterling Heights, MI. 48310 ?
www.raycofixture.com ? ph.800.443.8827 ?
fx.586.795.3260
01/13/09 1316
3
4
Set-up Instructions.
3
2
A Suction Cup Hoses
B Vac. pump to manifold.
2 Included in the Vacuum bag there are 2 types
of hoses A-Random Lengths for attachment from
Manifold to Suction Cups. B-1 length, 10-15
depending on ordered kit for Vac. Pump to
manifold. 3 Attach the B hose with the straight
hose connector into the Vacuum Pump inlet.
The Rayco Solution. Everything to hold Anything.
Your single source for Modular Fixtures.
5520 Bridgewood, Sterling Heights, MI. 48310 ?
www.raycofixture.com ? ph.800.443.8827 ?
fx.586.795.3260
01/13/09 1316
4
5
Set-up Instructions.
Manifold Inlet Coupler
5
4
Elbow Connectors
4 Included in the kit are extra Elbow connectors
5 Cut the Vacuum Pump to Manifold hose, to the
desired length. Insert one of the extra elbow
hose barbs into the open end of the vacuum
hose. Insert the elbow end into the manifold
inlet (at the end of manifold) If the connector
does not (click in), depress the metal clip on
the coupler.
The Rayco Solution. Everything to hold Anything.
Your single source for Modular Fixtures.
5520 Bridgewood, Sterling Heights, MI. 48310 ?
www.raycofixture.com ? ph.800.443.8827 ?
fx.586.795.3260
01/13/09 1316
5
6
Set-up Instructions.
6
On
Off
6 When the previous 5 steps are complete, you
are now ready to turn on the Vacuum Pump. ?Slide
the Brass valve towards the pump to activate the
vacuum, the pump will exhaust the air from the
opposite end of the pump. ?You will now have
vacuum captured in the manifold. NOTE Optimal
air pressure is 57 PSI. If the pressure exceeds
80 PSI the Vacuum will start to reverse and loose
SCFM.
The Rayco Solution. Everything to hold Anything.
Your single source for Modular Fixtures.
5520 Bridgewood, Sterling Heights, MI. 48310 ?
www.raycofixture.com ? ph.800.443.8827 ?
fx.586.795.3260
01/13/09 1316
6
7
Set-up Instructions.
7
8
9
7 NOTE The couplers on top of the manifold are
(closed style) no vacuum will be attained until
an elbow connector is plugged in. 8 Plug in the
desired length Suction Cup hose. NOTE If the
elbow hose barb does not go easily into the
coupler, depress the steel clip on the coupler,
then push in the hose barb. Make sure that the
steel clip on the coupler snaps out to assure
leak free vacuum. 9 Push the open end of the
vacuum hose into the Suction Cup inlet coupler.
You will now have Vacuum at the Suction Cup, plug
in the desired amount of suction Cups to hold the
part.
The Rayco Solution. Everything to hold Anything.
Your single source for Modular Fixtures.
5520 Bridgewood, Sterling Heights, MI. 48310 ?
www.raycofixture.com ? ph.800.443.8827 ?
fx.586.795.3260
01/13/09 1316
7
8
Set-up Instructions.
10
10 The above example shows a typical part
set-up, using 4-10mm vacuum cups to hold the part
down, and 3-Locator Stand-offs to (Clock) or
locate the part. The location stand-offs are
critical for repeatable set-ups. NOTE The
vacuum is attained through 1 common inlet. When
using 4 cups like in the example above, all 4
cups must be covered by the part in order to
attain vacuum. If there is one open vacuum line
or suction cup, vacuum will not be attained!
The Rayco Solution. Everything to hold Anything.
Your single source for Modular Fixtures.
5520 Bridgewood, Sterling Heights, MI. 48310 ?
www.raycofixture.com ? ph.800.443.8827 ?
fx.586.795.3260
01/13/09 1316
8
9
Set-up Instructions.
11
Black release valve.
11 To release the vacuum line from the Suction
Cup, pull the black plastic release on the
Suction Cup, towards center of the cup, then pull
the vacuum line free from the inlet coupler.
The Rayco Solution. Everything to hold Anything.
Your single source for Modular Fixtures.
5520 Bridgewood, Sterling Heights, MI. 48310 ?
www.raycofixture.com ? ph.800.443.8827 ?
fx.586.795.3260
01/13/09 1316
9
10
Congratulations On you purchase of the Rayco CMM
Fixture (Vacuum Holding System)
To find other Vacuum options, please contact your
distributor or go to www.raycofixture.com/Vacuum-
products-c33.html
The Rayco Solution. Everything to hold Anything.
Your single source for Modular Fixtures.
5520 Bridgewood, Sterling Heights, MI. 48310 ?
www.raycofixture.com ? ph.800.443.8827 ?
fx.586.795.3260
01/13/09 1316
10

