
How to Build a Successful Education Website Using WordPress?
Title:
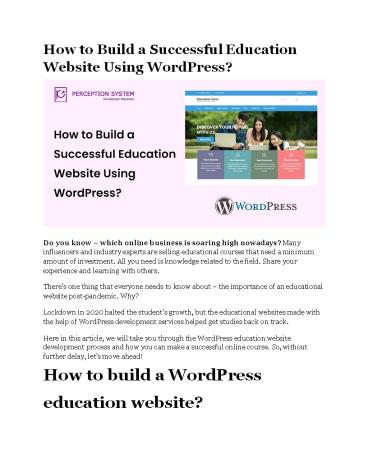
How to Build a Successful Education Website Using WordPress?
Description:
Learn How to Quickly create a Step By Step Education Course in WordPress Development. A Mobile-Friendly feature like Online Quiz, Online Meeting, Good Error Handling. Reference Link: –
Number of Views:35
Title: How to Build a Successful Education Website Using WordPress?
1
How to Build a Successful Education Website
Using WordPress?
Do you know which online business is soaring
high nowadays? Many influencers and industry
experts are selling educational courses that need
a minimum amount of investment. All you need is
knowledge related to the field. Share your
experience and learning with others. Theres one
thing that everyone needs to know about the
importance of an educational website
post-pandemic. Why? Lockdown in 2020 halted the
students growth, but the educational websites
made with the help of WordPress development
services helped get studies back on track. Here
in this article, we will take you through the
WordPress education website development process
and how you can make a successful online course.
So, without further delay, lets move ahead!
How to build a WordPress education website?
2
Many website development platforms are there, but
why are we suggesting WordPress only? The reason
is around 14.7 of the top websites are created
with the help of WordPress. For creating an
educational website that will provide custom
eLearning solutions, it has ready-made templates
for use.
Step 1 Setting up a WordPress Website
The very first step is to set up a WP website.
For that, you will need to login to wordpress.org
and not wordpress.com. Why? The former is a
self-hosted platform, while the latter is a
hosting service only. Register and purchase the
right package for your website.
Step 2 Installing and Setup Tutor LMS
The next step is to install and set up Tutor LMS
(learning management system). What is it? It is
one of the best and efficient Learning Management
Systems with WordPress.It is an LMS plugin that
is easy to use. With the help of Tutor LMS, you
can create resourceful courses through a drag and
drop system. Being a user-friendly plugin, it
allows you unlimited customization with plenty
of options. You can manage the entire course with
its help, take quizzes, create puzzles, plan
lessons assignments, and many more. How to
install the plugin? Login to WordPress admin
panel gt Plugins gt Add New gt Search Tutor LMS gt
Click on Install Now gt Activate.
3
Step 3 Creating a Professional Learnings
As soon as you activate the plugin, there will be
the basic WP editor on the screen. This is where
you will build or create your first course. The
very first block is the title block to add the
courses name. On the side, fill the boxes with
the name description, categories, and tags. As
for the courses content, it will go in the meta
boxes after scrolling down.
4
It also allows you to create new lessons, add
images, videos, and even .pdf files to
the specific topic. For every new lesson, an
editor pop-up box will appear where you can add
the content. Once you have completed building
the course. At the last, you will see the
Additional Databox, where you can mention the
course duration, requirements, benefits, targeted
audience, materials needed, and even the
introductory video.
5
Apart from that, Tutor LMS also allows you to add
the instructor. These features are just a
glimpse of the plugin. It has many more things to
offer. One thing is sure that with the help of
the Tutor LMS plugin, you can create a custom
eLearning solution smoothly.
Step 4 Selecting the Excellent Educational theme
Always remember, you must choose an educational
theme that is easy to navigate and understand.
There are many themes in WordPress that are
particularly designed for learning purposes.
6
Why should you go for themes designed for
educational purposes? Well, it will have
everything an educational website requires. Your
work will get easier. These themes come with an
influential framework, advanced features,
different page layouts, and many more.
Step 5 Installing and Activating the theme
As soon as you finalize the ideal theme for your
educational website, its time to install it.
How to install and activate the theme? Login to
WP-admin gt Appearance gt Themes gt Add New gt Click
on the selected theme gt Install gt Activate.
Step 6. Restrict Course Access to Membership
Plans
If you want to restrict your content access,
select the Tutor LMS Pro plan. Then, go to add
ons and install Restrict Content Pro. Enable it
for monetization from the setting tab.
7
Now, you can update the membership plans. Go to
the Restrict tab on Dashboard, and add new
membership plans with their name, categories,
requirements, deadlines, etc.
Step 7. Adding a Link to Course Sign up and
Register Page
- The next step is to add the course sign-up and
register page for students. It is as simple as
creating a new WordPress page. Dashboard gt Pages
gt Add New and follow the steps - Add title Course Registration Page and welcome
line in the description, - Click on the () button on the right-hand side,
- Choose Tutor Student Registration,
- Add more content if you wish to and hit preview,
- Then, Publish.
- Now assign the student registration page. How?
Dashboard gt Tutor LMS gt Settings gt Students gt
Select the student registration page you just
created.
Step 8. Preview Customize Your Online Course
The last step is to preview the course you
created. Analyze the entire curriculum properly,
note down the changes (if any), and customize it
accordingly. Once everything is done, your
online course is good to go live.
Conclusion
Isnt it easy to build an education website using
WordPress? Then, what are you still waiting for?
Create your education website, sell courses, and
earn money. In the end, the pandemic did
something good for people like us. As everybody
is going for the online courses, you have higher
chances of getting as many students.
Recommended
CrystalGraphics Presentations


![How to Use Customer Education As a Marketing Tool [Tips & Checklist]](https://s3.amazonaws.com/images.powershow.com/9857872.th0.jpg?_=20230224083)


