
How Customize the Design Work from Product Page
Title:
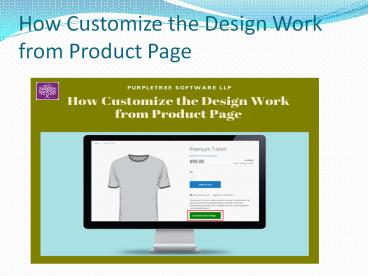
How Customize the Design Work from Product Page
Description:
Using Purpletree Custom product (web to print) for Magento2 Designer admin can define any product as designer product and can define the design area where front user can add Text, Clipart, and Images as per there requirement and places an order which will be received by the Admin and admin can print that product and dispatch the designed product to the user. visit here:- –
Number of Views:18
Title: How Customize the Design Work from Product Page
1
How Customize the Design Work from Product Page
2
- Using Purpletree Custom product (web to print)
for Magento2 Designer admin can define any
product as designer product and can define the
design area where front user can add Text,
Clipart, and Images as per there requirement and
places an order which will be received by the
Admin and admin can print that product and
dispatch the designed product to the user. - Designing the product using a Custom Product
Designer is too easy. Once the admin has defined
the product as a Designer product and defines the
design area then the front users open that
product from the frontend there they can see 1
extra button i.e. Customize the Design along with
other buttons as Add to cart or as per the theme.
3
When the user clicks on the Customize the
Design button, the Designer page would open, if
for some reason this button is not visible in
some theme please contact Purpletree Team via
Helpdesk so that we can support your theme.
4
- Once the Designer page is opened users can design
the product as per their need. There are 3 types
of input which user can add in the Designer area.
Here below we will discuss the Text layer only.
5
- Add Text - Using this user can add any text in
the Design area, can write anything, when the
user clicks on Add text, a small block would open
which would have the following options
6
- TextArea Box Here Enter the Text which would be
visible as you write in the design area. - Font Family - Click here to select from Font for
the Text added or editing, we have added
predefined Fonts in there you can choose any
font from the popup. Double-click the font or
select and click on the Select Font button on the
bottom.
7
- Text Color - Select Color from the color picker
for the text added.
- Font Size - Select the font size from DropDown.
Font Size is available from 10 to 198. - Background color Select the Background color
for the text added from the color picker. - Shadow For Shadow Enter values in Right,
Bottom, and Blur. Select color for Shadow from
the color picker and to apply the shadow click on
the Apply button below for all changes to apply.
8
- Text style - Select the Text style
as Bold, Italic, or Underline or all on click of
each button. - Text align - Select if want the text to be left,
center or right align. - Horizontal scale If want the text to scale
horizontally, enter a value here accordingly. - Vertical scale If you want the text to scale
vertically, enter a value here accordingly. - Rotation(in degrees) To rotate the text at any
angle, from 0 to 360 degrees. - Line height- Enter the Line height of the text
added. - Outline width Enter the width of the outline,
enter 0 if you dont want any outline. - Outline Color Select color from color picker
for Outline color. - View Source Here- https//bit.ly/33t19YF
9
(No Transcript)
Recommended
CrystalGraphics Presentations


