Science Lesson Plan - PowerPoint PPT Presentation
Title:
Science Lesson Plan
Description:
Difference between living and non-living things for 1st grade. – PowerPoint PPT presentation
Number of Views:5645
Title: Science Lesson Plan
1
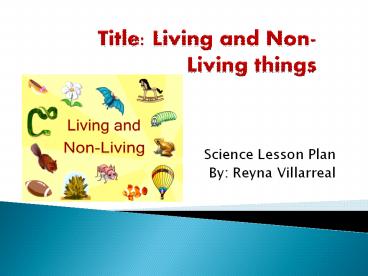
Title Living and Non-Living things
- Science Lesson Plan
- By Reyna Villarreal
2
Science Lesson Plan
- 1st graders age6-7 years old
- Purpose
- After reading, comparing, classifying and
learning about living and non-living things
students will be able to identify what is living
and non-living in the world around them. - Objectives
- Students will identify living and non-living
things. - Students will compare and classify living and
non-living things. - Students will learn characteristics of living and
non-living things.
3
Anticipatory Set
- Teacher asks students the difference between a
table and student. She will ask, does the table
move? And how about your friend? Does your friend
eat or drinks water? And how about the table? - Well, today were going to learn about living
and non-living things. Here are few differences,
living things are alive and active.They move,
grow, drink, and eat. Some of the examples of
living things around us are plants, animals and
other human beings. Non-living things do not
grow, do not move and nor eat or drink. Some of
the examples of non-living things are table,
chair ,bags, books etc.
4
Input
- First of all, the teacher shows a video on living
and non-living things. http//www.youtube.com/watc
h?vcPiNTkCmmv0t39 - Then, the teachers will ask questions on the
video. - Why was the little boy crying?
- Why didnt the teddy bear eat chocolate?
- What living things did you see in the video?
- What non-living things did you see in the video?
- How do you know something is a living thing?
- How do you know something is a non-living thing?
5
Input
- Now the teacher, sits the children on the carpet
and them to look around and find living and
non-living things. They complete the following
chart.
6
Modeling
- Students will come to the board and cross out
non-living things and circle living things.
7
Guided Practice
- The teacher will give the following worksheet to
her pupils. She will read instructions and cut
out all the pictures. Then she will get any
picture and ask her students in which column it
belongs. Then, she will glue it. - The children will need scissors
- and glue stick.
8
Independent Practice
- Students would work on the rest of the worksheet
on their own.
9
Assessment
- Students will be evaluated like this, the teacher
will provide a quiz on the topic. Students need
to write L for living things and N for non-living
things.
10
Closing/ Summary/ Review
- Students will play the following online games
using the smart board. - http//www.sciencekids.co.nz/gamesactivities/plant
sanimals.html - Finally, students will take their science journal
for homework and find living and non-living
things in their neighborhood. They will draw and
classify.
11
Sources
- http//www.instructorweb.com/lesson/livingthings.a
sp - http//www.makemegenius.com/science-videos/grade_2
/living-and-nonliving-things-for-kindergarten--pre
schoolers - https//www.google.com.mx/search?qlivingandnonl
ivingthingsworksheetrlz1C1ASAC_enMX466MX472es
_sm93biw1280bih709tbmischtbousourceuniv
saXeiY2FxVOiFN4SjgwS7sIOgBwved0CBsQsAQ

