How to Install or Replace a Kitchen Faucet - PowerPoint PPT Presentation
Title:
How to Install or Replace a Kitchen Faucet
Description:
Kitchen remodels require a multitude of skills from conception to completion, and ours was no exception. The faucet came with a round gasket and a deck plate and gasket. Unscrew the mounting nuts that hold the faucet to the sink, using either the wrench or the pliers. For more detail visit at: – PowerPoint PPT presentation
Number of Views:124
Title: How to Install or Replace a Kitchen Faucet
1
How to Install or Replace a Kitchen Faucet
2
Install or Replace a Kitchen Faucet
The process of hooking up water lines seems
anti-climactic compared to the bulk of the
work-getting the faucet assembly seated in
place.
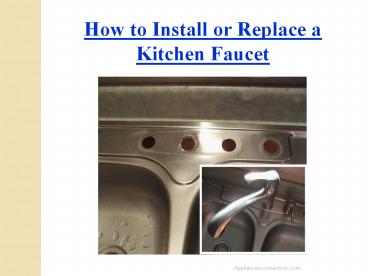
- Kitchen faucets come in two main types.
- 3-Hole
- 1-Hole
3
- 3-Hole
- This installation has a more traditional feel.
The faucet runs through the centre hole. - Separate hot and cold valves flank the faucet,
hot on left, cold on right.
4
- 1-Hole
- This installation has a more modern look.
- A deck plate covers all of the holes the two
flanking holes are completely covered up, since
they will not be used, and the centre is left
open to accept the faucet assembly. - We will be discussing this 1-hole deck plate
method in this article.
5
Affix Deck Plate to Sink
- Affix the deck plate to the sink with clear
silicone sealant. - The purpose is not to provide stability for the
faucet (this happens later), but to seal the
plate and prevent water from infiltrating
underneath. - Water that gets under the deck plate can seep
through the holes and get moldy and disgusting.
6
Insert Faucet Assembly Through Hole in Deck Plate
- One hand, hold together the grouping of hoses
coming out of the faucet assembly and insert into
the centre hole. - Other hand is holding the faucet assembly
itself.
7
There should be three lines
- Hot water supply line
- Cold water supply line
- Hand sprayer line
Hot Cold water supply line
8
Insert Gasket and Rings Over Supply Lines
- Different kitchen faucets will have different
means of attaching to the sink - Rubber gasket and metal washer as high as
possible, until they reach the bottom of the
sink. Hold them in place with one hand.
9
The case of this faucet, three pieces run up the
supply line
Rubber gasket (top)
Metal washer (middle)
Locking plate
10
Working under the kitchen counter
- Push these three pieces, in this order, up both
supply lines and the dishwasher line. - Push the rubber gasket and metal washer as high
as possible, until they reach the bottom of the
sink. - With the other hand, screw the locking plate
clockwise up the threaded shaft of the faucet
assembly.
11
Secure and Tighten Screws on Metal Ring Plate
- The locking plate is now threaded onto the
faucet shaft. - Grab the supply lines with one hand and gently
jiggle back and forth. - Keep jiggling as you tighten the locking plate
by hand until it is finger-tight. - Tighten the screws on the locking plate with
the screwdriver.
12
Tighten Nuts on Supply Lines
- Connect the supply lines from your house to the
supply lines on the faucet assembly. - Tighten as hard as you can by hand. Then, with
an adjustable wrench, give each nut an extra half
turn.
13
Connect Hand Sprayer Line
- Connect the hand sprayer line from the house to
the line on your faucet assembly. - Screw the sprayer hose onto the hose nipple on
the bottom of the faucet. - Hand-tighten the hose nut, then tighten it a
quarter turn further using a basin wrench or a
pair of slip-joint pliers. - Test the faucet by turning on both hot and cold
water and letting run for about a minute.
14
Kitchen faucets are much more than just
functional necessities of delivering water, but
supply a design element. Than faucets are easy to
use, reliable, and have that class and elegance
that a lot of homeowners are looking.
15
Different Types of Kitchen Faucet
- There are lot design available in the market of
kitchen faucet. - There are different kinds of fixtures available
in the market to choose from, that differ in
quality as well as price. - When you are planning to buy a kitchen faucet,
the first thing you should consider is the
quality. - Kitchen faucets are available made with
different materials and finishes that include
stainless steel, brass, and chrome.
16
Different Kitchen Faucet
17
Remodel your kitchen with Install or Replace a
Kitchen Faucet. Get more deals of Kitchen Sinks
and Faucets visit at www.appliancesconnection.c
om


