
North Zone Communications Committee Bendix King GPH Command - PowerPoint PPT Presentation
1 / 47
Title:
North Zone Communications Committee Bendix King GPH Command
Description:
North Zone Communications Committee Bendix King GPH Command Portable Radio Important Information Bendix King GPH Command Portable Radio Important Information How To ... – PowerPoint PPT presentation
Number of Views:203
Avg rating:3.0/5.0
Title: North Zone Communications Committee Bendix King GPH Command
1
North Zone Communications Committee
- Bendix King GPH Command
- Portable Radio
2
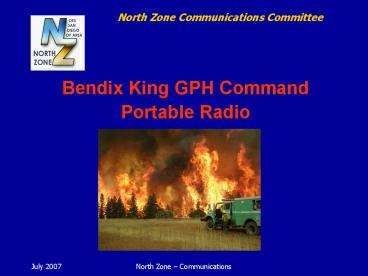
"Train as if your life depends on it...BECAUSE IT
DOES!"
3
Important Information
This introduction is being presented to
familiarize fire personnel to the basic
operations of the Bendix King GPH-CMD portable
radio. It does not necessarily cover every aspect
of the radio and encourages personnel to read the
publication titled GPH-CMD Portable Radio
Owners Manual
4
- Objectives
- Familiarize personnel with the basic controls of
the Bendix King GPH-CMD portable radio. - Review basic operations including
- Battery Removal and Installation
- Selecting a Group/Channel
- Building and Operating a Command Group
- Scanning/Priority Scan
- Selecting Tones
5
- Objectives
- Familiarize personnel with the basic controls of
the Bendix King GPH-CMD portable radio. - Review basic operations including
- Battery Removal and Installation
- Selecting a Group/Channel
- Building and Operating a Command Group
- Scanning/Priority Scan
- Selecting Tones
6
Bendix King GPH-CMD Basic Features
- 136-174 MHz VHF narrowband frequency range.
- 5 watts RF output.
- 500 channels, 25 user groups, 20 channels per
group. - On-demand Command Group enables building a
20-channel Command Group from any of the 500
programmed channels.
7
Alkaline Battery Clamshell
- Holds 9 AA batteries.
- Twice the life of the NiCad Rechargeable battery.
- Standard issue is orange.
- Some clamshells may be black or gray.
8
Nylon Pull Tab
- Tuck in behind batteries when installing
batteries. - Pull to remove batteries
9
Battery Capacity
- Some older clamshells take 10 batteries
- DO NOT use 10 batteries, a metal spacer is
required. - Will Overvolt and damage the radio.
10
Battery Orientation
- All positive poles go to the right.
- No need to flip-flop batteries like on other
devices.
11
Battery Removal and Installation
- Locate lock tab on right side.
- Depress tab and twist battery to remove.
- To install, position tabs into their recesses.
- Rotate battery until tab
- clicks and locks.
12
Basic Controls
On/Off, Volume
Squelch
Direct/Repeater
Channel Selector
Priority Scan (up is on)
Scan (up is on)
13
Basic Controls
Transmit Indicator Light
14
Basic Controls
- Indicator Light
- Priority
- Busy Channel
- Low Battery
15
Basic Controls
Antenna Accessory Mount Earphone PTT (Push
to Talk)
16
Basic Controls
Speaker Microphone LCD Display Keyboard
17
Basic Operations
- Turn power on by turning volume knob clockwise.
- Adjust squelch by turning squelch knob. Receive
Code Guard is disabled (far counter clockwise
click) - To transmit, press the PTT switch.
18
Selecting Channels
- Channels are arranged in 25 groups of up to 20
channels each. - The rotary knob selects channels in the group.
19
Identifying Programmed Channels
- Channel Reference Cards are provided. (Agency
Specific) - Designed to attach to radio or radio vest.
20
Identifying Current Group, Channel an Tone.
- Press once to display the Group
- Press again to display the channel and tone
you are currently using.
21
Identifying Programmed Channels
22
Remote Speaker / Microphone
23
Installing Speaker / Microphone
- Cord points up.
- Tighten thumbscrew
24
Hi / Low Volume Switch
- Switch pointing out is high volume.
25
Locking and Unlocking the Keyboard
- To lock an unlocked keypad, press FCN key once.
- To unlock a locked keypad, press FCN key once.
26
Understanding Groups
- Channels are arranged in 25 groups of up to 20
channels each. Groups are numbered 01-25.
27
Understanding Groups (continued)
- The Command Group is an additional group to
give a user the ability to create a scan list of
channels from multiple groups. This group is
labeled GRP CMND
28
Understanding Groups (continued)
- Group 15 is left open for major incident radio
plan cloning. This will normally be completed at
the Communications Unit at Base Camp. - If your portable was cloned by the Communications
Unit at the incident, have your agencies
communication technician reprogram the radio with
your agencies data file. This will ensure that
all of the programming parameters are returned to
their original settings.
29
How To Change Groups
- Turn off both scan switches (down) before doing
the following - To change groups press followed by the 2
digit group number and then press ENT key. - Example
- , 04, ENT
30
How To Change Groups (continued)
- Practice
- Change to group 04.
- Change to group 01.
- Change to group 25.
31
How To Add And Remove Channels To A Scan
List (While in Groups 01-25)
- Turn off both scan switches (down) before doing
the following
- To add current channel to a scan list press the
ENT key. - To remove current channel from a scan list press
the CLR key.
32
How To Add And Remove Channels To A Scan List
- Practice
- Change to Group 4.
- Add Command 2, CDF Tac 5 and CDF Air to Ground to
scan list. - Remove CDF Air to Ground from scan list.
33
Channels recommended for a scan list.
- Assigned Command channel.
- Assigned Tactical channel.
- Assigned Air to Ground channel.
- Air Guard (if assigned to incident).
34
How To Add A Priority Channel
- Turn off both scan switches (down) before doing
the following - Turn the Channel Selector knob to desired
priority channel. - Press the PRI key. A PR appears in display
indicating that channel is the priority channel.
35
Building A Command Group
- The GPH-CMD radio allows construction of a
Command Group of up to 20 channels, drawn from
any of the programmed channels in the radio. - To add or delete channels to the Command Group,
turn off both scan switches (down) before
programming.
36
Building A Command Group (continued)
- While operating in a group other than the Command
Group (group 1-25), the user selects a channel in
the radio and presses the key to enter the
channel into the Command Group. - After adding a channel, the display momentarily
shows CMND CHAN XX where XX is the channel
number (1-20).
37
Operating From The Command Group
- To change groups to Command Group press
twice and then press ENT key. - The rotary knob selects channels in the group.
- To delete channels in the Command Group, press
while on the selected channel. - Exit the Command Group to add new channels.
38
Operating From The Command Group
- Practice
- Change to Group 4 and add CDF Command 1 and CDF
Air to Ground to Command Group. - Change to Group 5 and add RRU Support 6 to
Command Group. - Change to Command Group and verify channels have
been entered.
39
Priority Operation
- Slide priority switch up.
- Scans the priority channel as well as the channel
selected by the channel selector knob.
- If message received on programmed priority
channel, radio locks onto that channel until
message is complete.
40
Scan Operation
- Slide scan switch up.
- Scans all channels programmed into scan as well
as the channel selected by the channel selector
knob.
41
Priority Scan Operation
- Slide scan and priority switch up.
- Scans the priority channel, all channels
programmed into scan as well as the channel
selected by the channel selector knob.
- If message received on programmed priority
channel, radio locks onto that channel until
message is complete.
42
Priority Scan Operation
- Practice
- Switch to Command Group.
- Scan channels with CDF Tac 5 as the priority
channel
43
Programming Tones
- Turn Direct/Repeater switch to RPT
- Turn off both scan switches (down) before
programming tones. - While on a channel that is Enabled, enter a
number from 1-16 representing the desired tone.
The display will show the desired tone. - The GPH Command allows for a specific tone to be
assigned to individual channels within the group. - Example
- 4
44
Programming Tones
- Practice
- Switch to Group 4, Monte Vista Local.
- Switch to Tone 4.
- Switch Tone off.
45
Agency Specific Variations
- Some buttons, toggle configurations and radio
functions can be individually configured by each
agency and can vary even within an agency. - Be aware of this when sharing radios on an
incident.
46
- Review of Objectives
- Familiarize personnel with the basic controls of
the Bendix King GPH-CMD portable radio. - Review basic operations including
- Battery Removal and Installation
- Selecting a Group/Channel
- Building and Operating a Command Group
- Scanning/Priority Scan
- Selecting Tones
47
Learn to use it before you need
it! Remember LCES!
Recommended
CrystalGraphics Presentations


