Logging on - PowerPoint PPT Presentation
1 / 10
Title:
Logging on
Description:
You will now be presented with the logon screen. Enter your username, password and pin, ... Show roadmap click to access multimap and detail property location ... – PowerPoint PPT presentation
Number of Views:40
Avg rating:3.0/5.0
Title: Logging on
1
Logging on
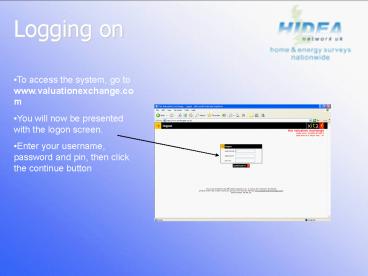
- To access the system, go to www.valuationexchange.
com - You will now be presented with the logon screen.
- Enter your username, password and pin, then click
the continue button
2
The Welcome Screen
- You will now be presented with the welcome
screen. - This screen shows you
- How many instructions are waiting
- How many appointments are over 48 hours old, yet
have no report submitted - Any news items in relation to the xit2 system
- To access the instruction control screen, click
continue
3
Instruction Control
- You will now be presented with the Instruction
Control screen. - This screen is for managing work, booking
appointments and submitting reports - To view / read the jobs, you are able to access
the property by clicking on the address in jobs
offered, or the chevrons to the right hand side - NB if you have more than one job, use the
chevrons, as this allows you to scroll through
each job, rather than having to revisit the
instruction control screen every time
4
Accepting or Declining the Job
- This screen shows you the details of the job,
along with giving you the opportunity to decide
whether or not you wish to take it. - Accept means you accept the job. The 3 day
turnaround time now starts, and it moves to the
awaiting appointment date section on the
instruction control screen - Decline - you decline the job, and it is removed
from the list - Wait if you cannot decide, click wait and it
allows you to move onto the next job, however the
3 hour acceptance time is still clicking. The
property remains in the offered section - Accept and print as accept, but also allows you
to print the details also
5
Booking the Appointment
- Once you have reviewed all jobs, and made your
decisions, you must return to the instruction
control screen, in order to book the
appointment's. - Those awaiting appointments will be found in the
awaiting appointment date section of the
screen. - To book the appointment - click on the chevrons
to the right hand side of the address in
question. - You will then be taken through to the
instruction / appointment details screen
6
Instruction Details
- Dates /times can be manually input, using the
arrows. - Boundary times can be input, AM 9 - 12 /
PM 1 5, using the radio buttons - Assign to - will default to DEA assigned to
office, or if a one office practice, to that
person. - Notes to valuer a free text box and for
internal use. The information doesnt go
anywhere. - Send letter a standard letter can be generated
to gain access, not to confirm appointment - Print details includes all notes to DEA
- Show roadmap click to access multimap and
detail property location - Once completed / changed click submit button
- The property now moves onto the awaiting report
section of the instruction control page.
If the date agreed is later than 3 days from
acceptance of the job, an error message will
appear. You must input a reason for the delay,
then re-submit.
7
Holding the Job
- If, for some reason, after accepting the job, the
vendor is unable to commit to an appointment for
some time, you are able to hold the job, so the
clock stops ticking. - To do so
- Click on the chevrons to the right of the
address, within the awaiting appointment of the
instruction control screen - Once in the instruction details screen, scroll
down and click on the Hold / Cancel button
8
Holding the Job Contd
- You will now be presented with the change
instruction status screen. - Select the appropriate reason from the Reason
for Request drop down box. - Now select the change requested, using the
Request Change drop down box. - Once completed, click the Submit Request button
- The request will now be sent to the panel manager
for a decision. Once the job has been frozen, the
DEA cannot access the job, at all. The panel
manager must be contacted to unfreeze the job.
To take the job off hold, you must make a change
request, using the same process as holding the
job, but requesting take job off hold, in the
request change drop down box.
9
Adding the Report
- Once you have carried out the energy performance
certificate, you can upload the report using the
xit2 system. - To do so -
- Log in as previously detailed, ensuring you get
to the instruction control page. - The property will be located in the awaiting
report section of the screen. - To access, click on the chevrons to the right
hand side. - You will now be taken through to the report
submission screen, supplied by your accreditation
body.
10
BRE Accreditation
Should you be accredited to BRE, you must submit
your report directly through the BRE
system. Once completed, re access the xit2
system, click on the appropriate chevrons in the
awaiting report section, then add the relevant
RRN / URL number Once entered, click the
completed button


