Zebra 4000 Printer Configuration - PowerPoint PPT Presentation
1 / 14
Title:
Zebra 4000 Printer Configuration
Description:
An IP address will be required prior to adding a Zebra 4000 printer to the network. ... Once installed, access the Zebra net program through through the ... – PowerPoint PPT presentation
Number of Views:68
Avg rating:3.0/5.0
Title: Zebra 4000 Printer Configuration
1
Zebra 4000 Printer Configuration
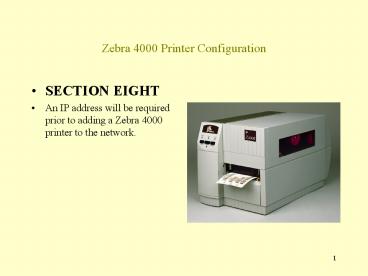
- SECTION EIGHT
- An IP address will be required prior to adding a
Zebra 4000 printer to the network.
2
Z4000 NETWORK INTERFACE CARD
- To add the printer to the network, install the
print server to the printer and connect it to the
lan system.
3
Z4000 NETWORK INTERFACE CARD
- Once the interface card is connected to the
printer and the Network, press the test button. - A label should print with the print server
information.
Test Button
4
Zebra 4000 Printer Configuration Label
- The General hardware address will be necessary
for both the print server install on the network
and the NTCSS install.
5
Zebra Printer Configuration Software
- Access the Zebra 4000 accessories CD that
accompanies the printer - Select Software
6
Zebra Printer Configuration Cont.
- Select Print Server Software
7
Zebra Printer Configuration Cont.
- Select Zebra net Print Server II
8
Zebra Printer Configuration Cont.
- Highlight TCP/IP Management Utilities
- Select Next
9
Zebra Printer Configuration Cont.
- Highlight Zebra net view for IP
- Select Install
- Follow the install instructions (accept all
defaults)
10
Zebra Printer Configuration Cont.
- Once installed, access the Zebra net program
through through the Windows program menu.
11
Zebra Printer Configuration Cont.
- Select the Unconfigured Print Server option.
- The search engine will search for your
unconfigured print server - Once the server is located, the user will be
required to configure the printer.
12
Zebra Printer Configuration Cont.
- The H/W Address is the address on the label
previously printed (General Hardware Address). - Particular attention in selecting the correct
print server is required. - A new print server will have an IP of 0.0.0.0
- Highlight the correct printer
13
Zebra Printer Configuration Cont.
- Select Printer configuration
14
Zebra Printer Configuration Cont.
- Input the
- IP address
- Subnet Mask
- Default Gateway
- Select OK
- The printer should be ready to add to NTCSS.
- Follow the NTCSS printer setup instructions in
the FSA manual.


