Class today - PowerPoint PPT Presentation
1 / 25
Title:
Class today
Description:
Insertion of Tables to maintain formatting from MS Word. Insertion of ... In the conversion of an assignment / artifact to a webpage, be sure to save as ' ... – PowerPoint PPT presentation
Number of Views:38
Avg rating:3.0/5.0
Title: Class today
1
Class today
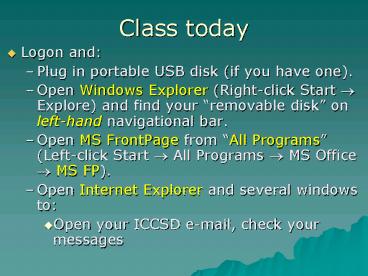
- Logon and
- Plug in portable USB disk (if you have one).
- Open Windows Explorer (Right-click Start ?
Explore) and find your removable disk on
left-hand navigational bar. - Open MS FrontPage from All Programs (Left-click
Start ? All Programs ? MS Office ? MS FP). - Open Internet Explorer and several windows to
- Open your ICCSD e-mail, check your messages
2
Items to do Today
- Setting up your USB disk for course web pages.
- Customize your course web pages with Microsoft
FrontPage - Introduce the MSLUV Process.
3
Setting up your USB disk
4
Notes re your web folder set-up
- label all folders and files w/ lower case
letters
- folder and file labels should have NO spaces or
/, \, , (), etc.
- folder file labels can have hyphens or
underscores to separate words.
- ALWAYS back up your folders files on some
external or portable disk (USB, CD, etc.).
5
Setting up your USB disk course folder structure
6
Customizing your course web pages with Microsoft
FrontPage
- Open MS FrontPage (for personalizing of your
course web pages) - Find and open your USB disk and your web ?
course_folder ? class_folder(s). - Create the following new web pages
- class_1.html (note lower case sensitivity)
- class_2.html
- class_3.html
- class_4.html
7
Customizing your course web pages (contd.)
- Once class_1 web page is open, click File ? Save
As - Click Change Title and change the page title to
your class name (e.g., Sophomore Science, Class
1). - Click Save As ? class_1.html (type no spaces in
lower case) - BEWARE Save as Web Page w/ .html as delimiter,
not as Single File Web Page w/ .mht!! - Links will be broken, otherwise!
8
Creating a new web page
9
Creating a new web page (contd.)
10
Correctly saving your course web page
Click on change title, then type in Pages title
Click Save As
Save As .html, not .mht!
11
What you new page looks like
Code Mode for HTML editing
Design Mode for editing most prefer to edit in
Design Mode
This is my course page.
View modes for editing
12
Setting up web pages Properties
13
Setting up web pages Properties (contd.)
14
Setting up web pages Properties (contd.)
15
Setting up web pages Properties (contd.)
- You can modify mouse over effects via
- Font type
- Font color
- Font style
- Font size
16
Editing creating content for your course web
page
Or in here Code mode.
Now you can begin editing your page here in
Design mode.
17
Advanced Features for Web Pages
- Adding MS FP Themes for a nicer look.
- Other Navigational tools w/in web page
- Bullets
- Buttons
- Additional hyperlinks
- Insertion of Tables to maintain formatting from
MS Word - Insertion of Images / Pictures
- Insert into tables to maintain formatting.
18
(No Transcript)
19
(No Transcript)
20
(No Transcript)
21
(No Transcript)
22
(No Transcript)
23
(No Transcript)
24
(No Transcript)
25
The MSLUV Process
- Make a file in MS Office (Word, PowerPoint, FP)
- Save as a web page
- Beware of single file web page!
- In the conversion of an assignment / artifact to
a webpage, be sure to save as web page, NOT as
single file web page! - Link the .html file(s) to and from other .html
file(s) / web pages. - Upload .html file(s) (Bldg. Webmaster will likely
do this). - Verify that all hyperlinks work


