
Keyboard Design - PowerPoint PPT Presentation
1 / 17
Title:
Keyboard Design
Description:
By changing the View, you can zoom in on the file for a closer look. ... Dish, Plate, Bowl or Platter of Salad. Notice that the Price for a Sm. Dish is left empty. ... – PowerPoint PPT presentation
Number of Views:29
Avg rating:3.0/5.0
Title: Keyboard Design
1
Keyboard Design
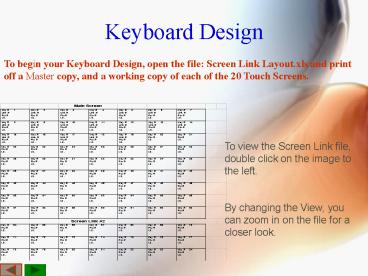
To begin your Keyboard Design, open the file
Screen Link Layout.xls and print off a Master
copy, and a working copy of each of the 20 Touch
Screens.
To view the Screen Link file, double click on the
image to the left. By changing the View, you can
zoom in on the file for a closer look.
2
Screen Links
The Main Screen represents the first screen
that you see on your POS Touch screen.
Each of the numbered squares represents a touch
button on that screen that is linked to a food
item from one of your database menus.
We recommend that you print off these screens to
guide you as you develop your Touch Screens, and
keep on file for future reference.
Each Screen has 63 keys laid out in a 7 x 9 format
Lets take a closer look at each button.
3
Key Design
- Each of the first 19 keys has 4 features
- A Key location that designates its numerical
value on your Touch Screen keyboard. - A Screen Link number that designates which
screen, if any, is linked to this key. The
Screen, which is associated with this key, will
be displayed when this key is activated. - A PLU from one of your Menus, that links this
key to that Menus Touch Screen, which you are
editing. - An abbreviated Item Description of the Food Item
(PLU) linked to this key, which you assigned in
step 3 above.
4
Other Keys
Since only the first 19 keys can have screen
links associated with them, the other keys do not
have the Link listed on them. Although screen
links can be used in the first 19 keys, they do
not have to be linked to a screen, but by doing
so you would make full use of over 1200 keys
available to you with this system.
5
Getting Started
You will need to begin by taking your menu items,
and categorizing them into groups or Main
Headings.
These Main Headings will Lead your cashiers to
screens that expand the detail of keys related to
that heading. By pressing the Beef Items key, a
screen of all Beef selections will be displayed.
The same will happen when the cashier presses any
of the first 19 keys that have a screen link
attached to it.
6
Completed Screen
After you have finished the rough draft of the
keyboard layout, you will be ready to enter that
data into the Touch Screen editor. When
completed, the data from the previous screen will
look like this on the Main Screen at the Point of
Sale. Note The image above is only a partial
image of the actual screen.
7
Planning your keys
To accomplish this, you must first use your
printed worksheet to pencil in the general layout
and the category of keys that best fits your
operation.
Although Screen Links do not need to be in
chronological order, it is easier to work
progressively if you do.
Remember that keys 20 and above, are not links,
and will only operate as any standard key, having
one PLU linked to it.
Sales Prices for keys will still reflect all
pricing levels for each Type of Customer you
serve.
8
Key Options
As noted earlier, Screen Links only apply to
keys 1-19. The other keys however, have an
assortment of options available that allow you to
configure an unlimited number of values for each
key.
Lets take a look at the other options available
to you with this system.
9
Cost Modifiers
Cost Modifiers are Modifications to the PLU price
that you have established in one of your Menu
Items, and have linked to one of the keys on your
Touch Screen.
For Instance, a Soft Drink usually comes in
various sizes Small Medium or Large. It can also
be sold in ounces 20 oz., 32 oz., 44 oz. These
can all be rung up using just one key identified
as Soft Drink, by using a cost modifier option
linked to the Soft Drink PLU. Each PLU in your
Menu Database can have up to four modifiers to
the sale price of that item. Again, that price
is a modifier to the original cost that you have
set for each Type of Customer you serve !
10
To set Modifiers
In the Menu Edit screen below, PLU 696, a
Salad Plate, has been modified to
adjust its price as customers choose
between a Sm. Dish, Plate, Bowl or Platter of
Salad.
Notice that the Price for a Sm. Dish is left
empty. This sets the default cost of a small
dish to the prices youve already set in the
Employee, Visitor, Admin, Student, Vol., and
Doctor settings. Modifiers will always add their
price to the pre-set price youve established for
your Customers.
In this example, an Employee who purchases a
Plate of salad will pay a total of .85 cents,
and a Visitor will pay 1.00 for the same dish.
The Modified Price added to the Set Price will
give you the total price for that dish.
11
Auto Notes
An Auto Note is a powerful tool that allows you
to create a database of food items within any of
your database menus. This data can then be
accessed by any or all of the menus you create.
The Auto Note will automatically bring up the
Note created for this menu item. This
versatility allows you to create a Note one time,
and then Link this note to one PLU, or a thousand
PLUs as often as youd like.
In this example, Biscuit Combo is checked to use
an Auto Note. The Note Link is number 15. The
Pre-set price is displayed in the Customers price
fields.
12
Creating Note Links
In the following example, Note Link 15 was
created to associate other PLUs to the Biscuit
Combo PLU. These additional links begin with
Gravy on line 70, and extend to Ham on line 75.
Gravy
Egg
Cheese
Sausage
Bacon
Ham
Just like Cost Modifiers, Note Links will add the
price and Nutritional Values of the Link to the
Pre-set Customers Price and Nutritional Values
of added foods.
13
Note Links
This is the screen that is displayed when the
Biscuit Combo key is activated. By selecting
Egg, Cheese and Ham, the cost of these items for
the Type of Customer selected..and the
Nutritional Values of these items.is added to
the cost and values of a Biscuit. This same
scenario can be created for Sandwich condiments,
and other additional items when they are added to
any menu selection !
14
Screen Review
- There are three methods of programming keys on
your Touch Screens - Screen Links
15
Modifier Review
- There are three methods of programming keys on
your Touch Screens - Screen Links
- Cost Modifiers
16
Note Link Review
- There are three methods of programming keys on
your Touch Screens - Screen Links
- Cost Modifiers
- Note Links
Note Links will create an unlimited number of
modifiers that can be associated with any
PLU. Nutritional Values, Food Guide Pyramid
portions and Prices are added to the PLU when
items are selected.
17
Endless Possibilities
As you can see, by using these Links, Notes and
Modifiers, you will be able to create a keyboard
that has endless possibilities for your facility.
Because of its simplicity, training time for your
cashiers is kept to a minimum. New employees can
be operating the system within just a few
minutes, and in a few hours, they will be as
efficient as your long term employees.
Its simple, innovative, and your customers will
be amazed at the Nutritional Values and Food
Guide Pyramid servings found on the receipt.
Recommended
CrystalGraphics Presentations


